Tuesday, April 30, 2013

blogger of the month: annika of pineneedle collective


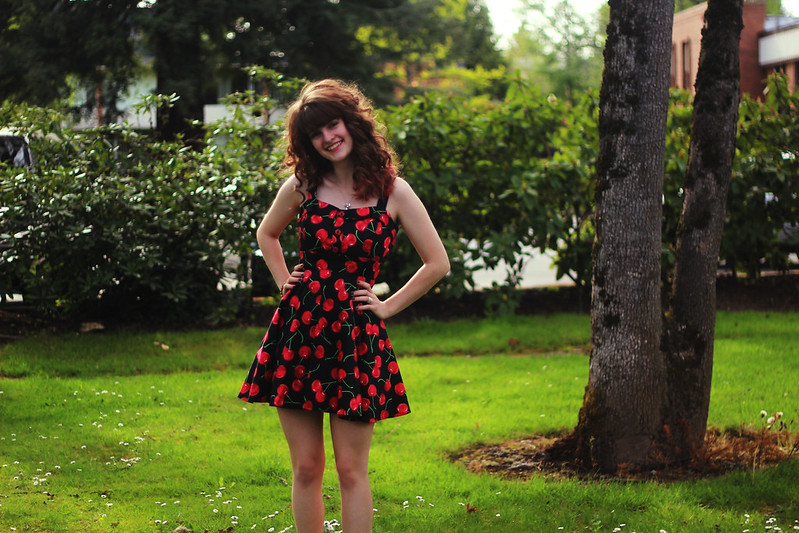
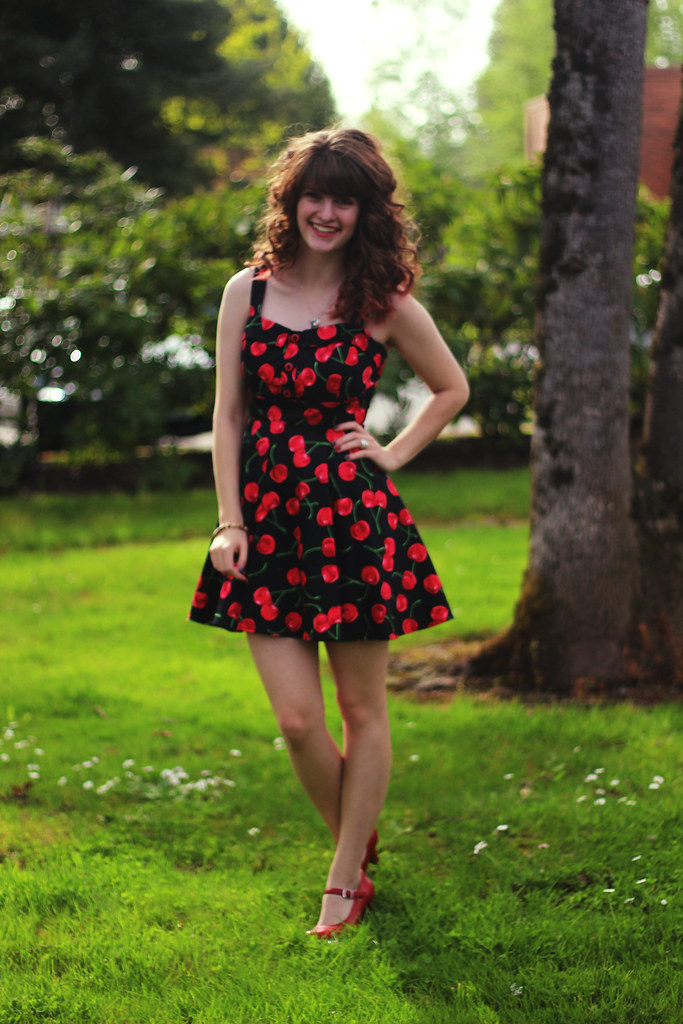
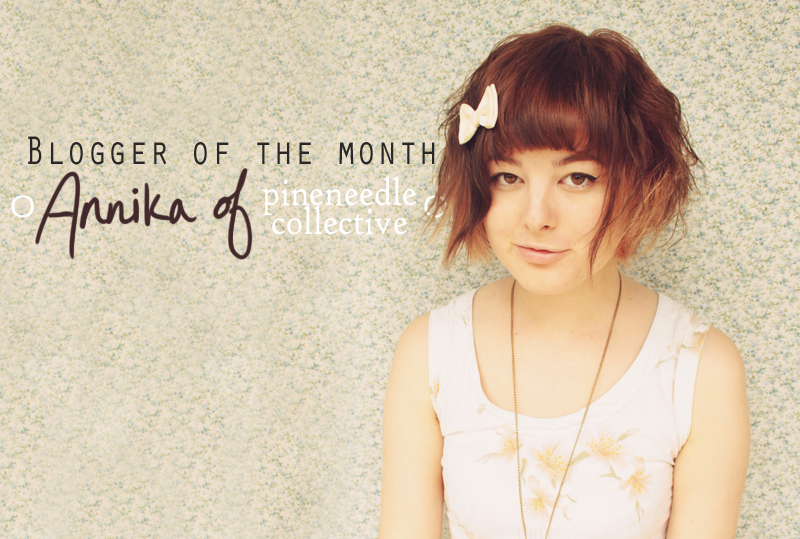
I have a super awesome post for you all today! I've been doing a few blogger of the month features, but when I started college I stopped. I'm really excited to bring back this feature, and with a bang at that, because my friend Annika kindly agreed to let me interview her! She is super awesome and has a fabulous sense of style, and I love reading her blog on a daily basis. So without further adieu, the blogger of April is Annika of Pineneedle Collective!


Well first of all, can you tell everyone a little bit about yourself?

I am a 20-year-old Sydney-sider who studies science, and I really like clothes.

How would you describe your personal style?

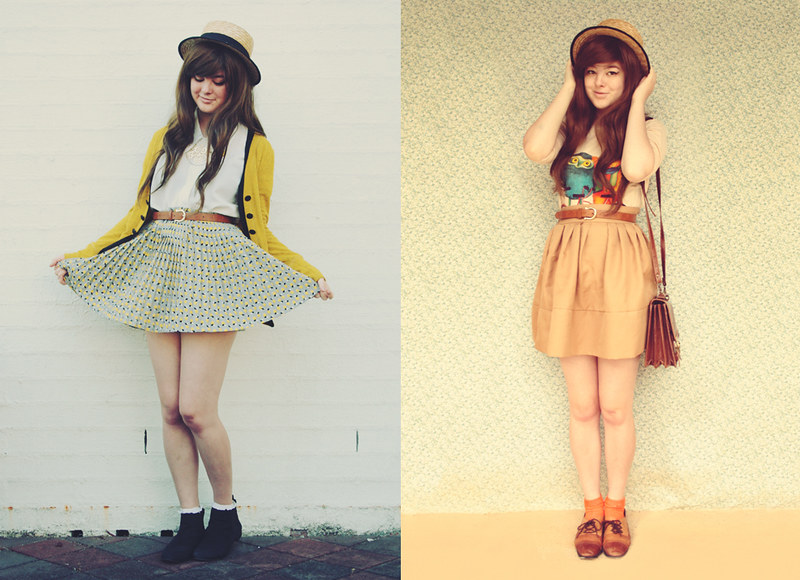
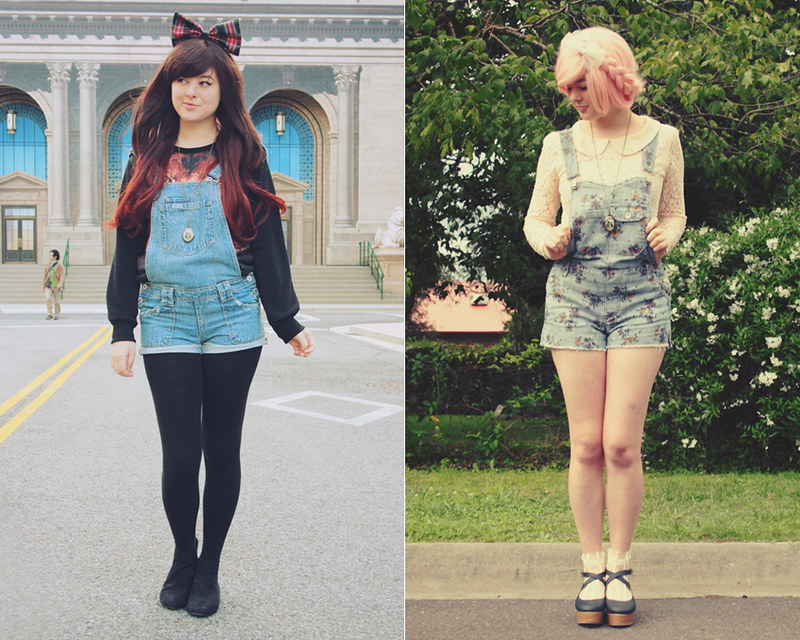
My style is probably first most "vintage inspired", and then I throw in elements of Japanese street fashion, lolita, novelty, retro, rockabilly and grunge depending on how I feel that day.


If you were stuck on a deserted island for the rest of your life, what one outfit would you wear?

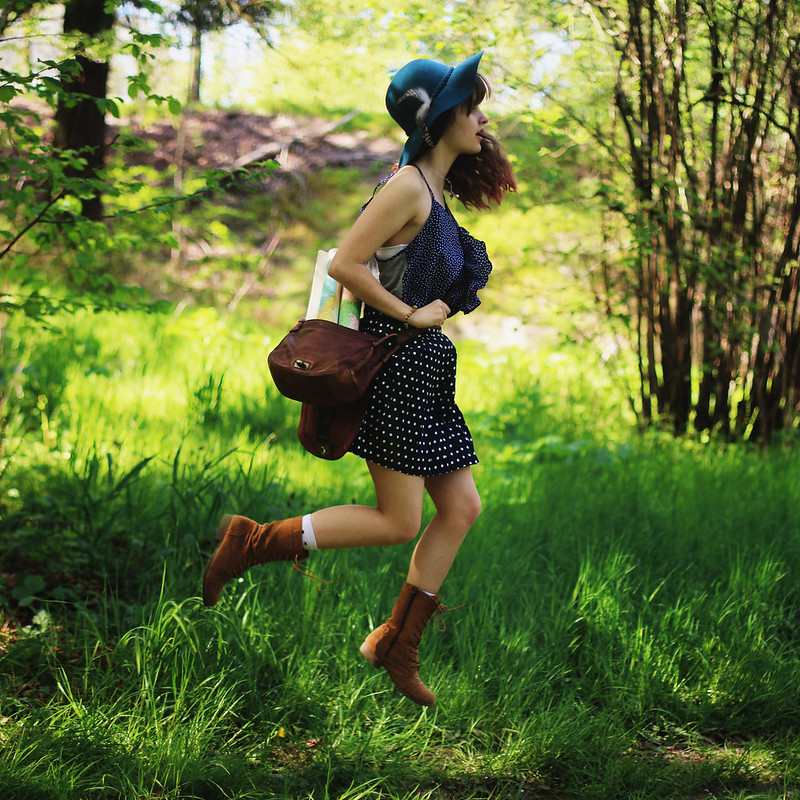
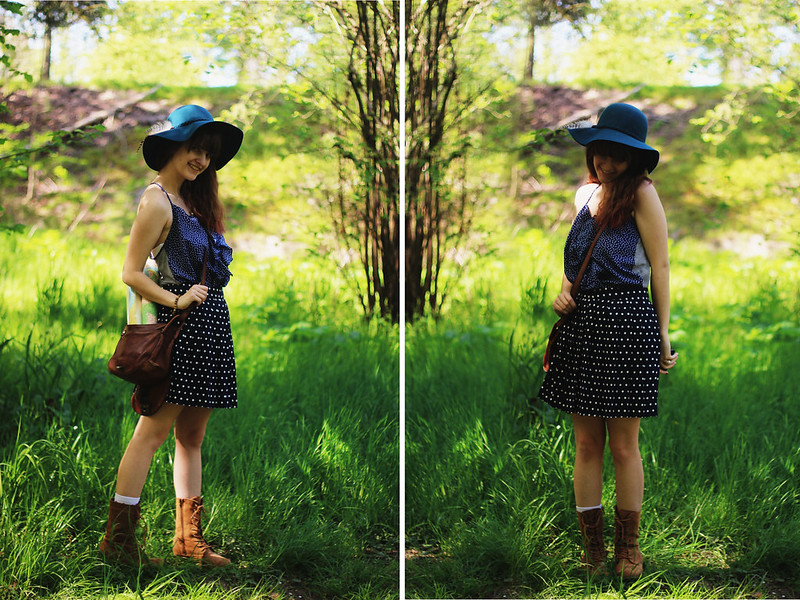
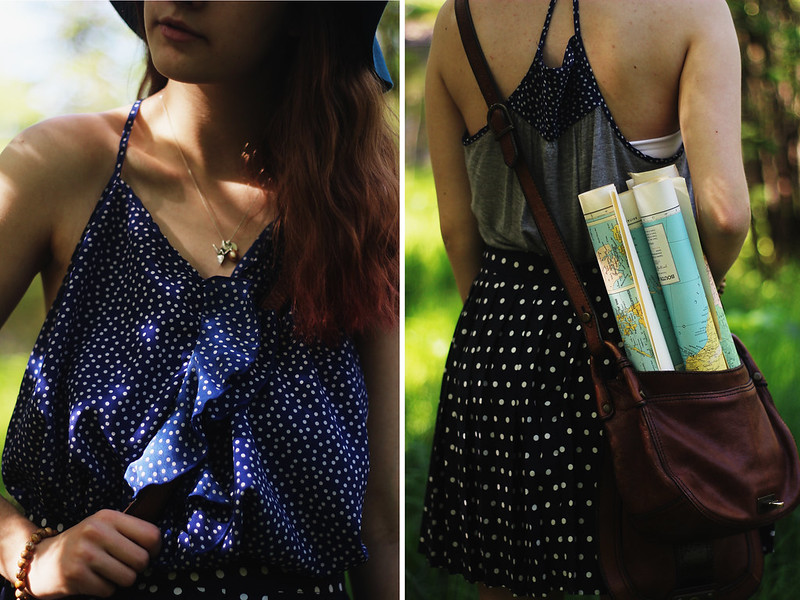
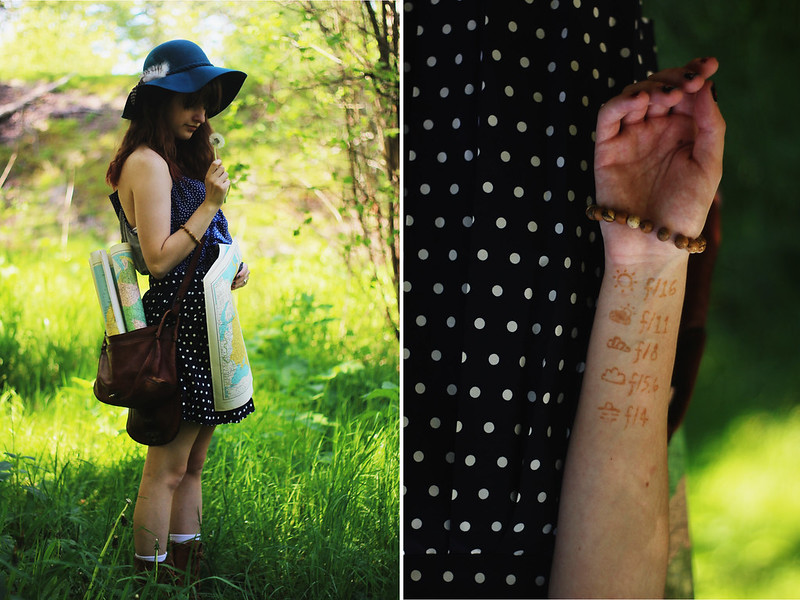
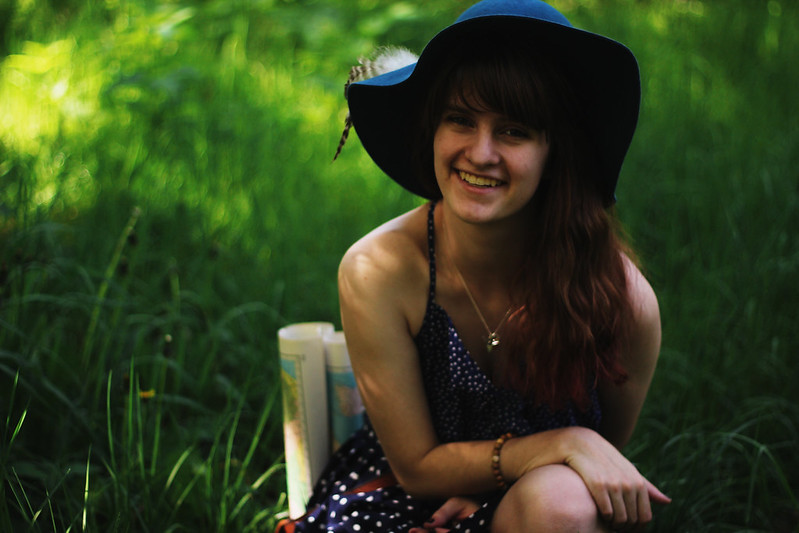
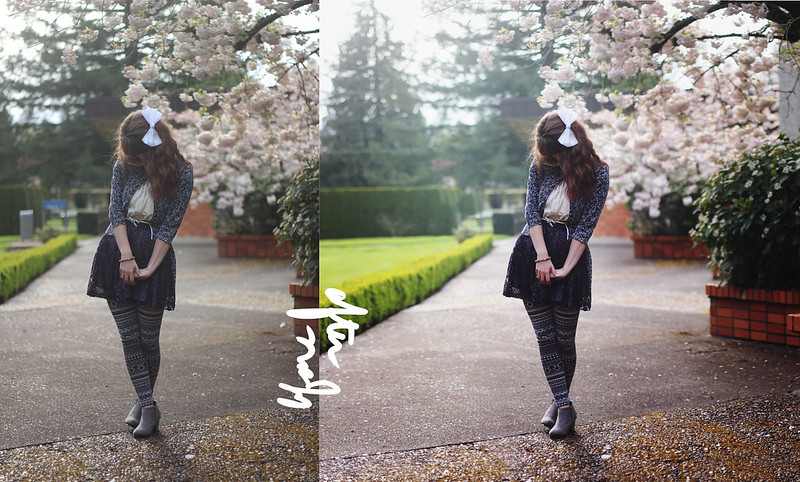
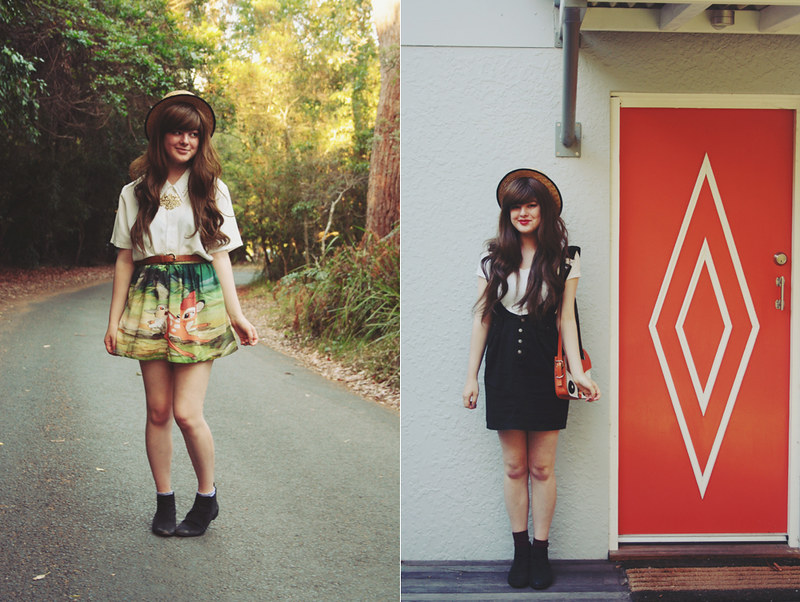
I think that if I were stuck on a deserted island for the rest of my life, I may not care too much about what I looked like anymore and I would also probably end up hating the outfit I chose, after having to look down at it every day for the rest of my life! But I will try and answer this question seriously. Of course, I would need to choose something that was at least slightly practical and wouldn't hinder my survival with over-the-top embellishments. I think that I would choose this outfit - not only is it one of the outfits I'm most proud of putting together, the dress is very light-weight and easy to move in, the hat would keep my face shaded, and I'd totally scare off other predators with the giant scary lion on the front of the dress. Plus those sweater pins I am wearing are pretty sharp on the edges, so I could use them as flints to start a fire.


What is your favorite thing about living in Australia?

The fact that we're very free to express ourselves. Oh! And all the great food we have here. Because Australia has a lot of migrants from basically every country in the world, it's had an awesome effect on the culture, and in particular the food. I can go from Chinatown to Little Italy in Sydney in about 10 minutes, and then get a snack from a Vietnamese restaurant just down the road and go shopping at a Lebanese supermarket.

Even though I am someone who isn't particularly interested in science, I always love your science facts at the end of your posts! What is your favorite thing about studying neuroscience and biochemistry?

My favourite thing about what I study is learning about how brains work, at almost every level! I find it endlessly fascinating how tiny changes to the chemistry or biology of the brain can cause total shifts in behaviour and the way the world is perceived. My favourite thing to research are lesion and pharmacological case studies where even tiny changes to the brain have caused radical differences in someone's memory or personality. It brings up the whole question of what exactly constitutes consciousness, and ultimately, what makes up who we are and our perception of reality.


What do you hope people get from your blog as they read it?

One of my aims with my blog is to show people that they can dress well on a budget. My outfits basically always feature thrifted items of clothing which I bought for a couple of dollars (which I rewear many times, because only wearing something once is silly). I also really hope to inspire people to study science, by making science interesting! Annnnd I also do a fair bit of making my own clothes - with the idea that people can learn to make something they saw on the high street rather than pay $300 for it.

Where do you see yourself in five years? Where do you see your blog?

In five years, I see myself having just completed masters in science, taking a year off and living in Japan, before starting a pHD in neurobiology. Fingers crossed! And as for my blog... I have no idea! I hope that I'll still be interested in blogging, but who knows what the next five years holds for it! I guess I would like to say I will be a super-famous-internet-blogger who gets flown around the world to fashion shows and blogging events, haha.


What is your current favorite piece of clothing?

My heart-backed, blue and orange Romwe dress.

How do you remain confident in your fashion sense when going out in public? Do you have any advice for people who are scared to dress like themselves?

1. Compile a number of outfits that you think you look awesome in. Prance about in them at home and in front of a mirror. Build up your confidence. If you go out looking confident in an outfit, you are guaranteed to pull it off. And always avoid wearing things that you constantly have to adjust/fidget with/pull down because these are serious confidence-sappers.
2. Buy things which suit you and your body shape. Don't buy clothes for a "curvier" you or a "thinner" you - buy clothes for exactly how you look right now.
3. Get yourself a fashion blog where people tell you how nice you look all the time (haha seriously though, this has actually helped me a lot).
4. Remind yourself that other people who dress "normally" are probably too scared to dress how they actually want to, and really, just look a bit boring.
5. Learn to embrace odd looks and side-glances - you're just making the world a more interesting place.


Thank you so much for letting me interview you, Annika! And be sure to check out her awesome blog here!


Monday, April 29, 2013

April photos

off the highway

"off the highway"

closing the gap

"closing the gap"

the bench

"the bench"

crown

"crown"

giving hope new life

"giving hope new life"


"portrait"

portrait edit from Lauren Parker on Vimeo.


"t + j"

t

"t"

when I am discovering

"when I am discovering"


This has been a good month for my photography. I've been deliberate with creating things that I feel like reflect my personal style. And while I was editing portraits for my friend Tabatha, it reminded me how much I love making photos for other people and just how badly I want to do this for the rest of my life.


Saturday, April 27, 2013

art student awards


dress: ebay // shoes: thrifted


I just got back from my university's art student awards! It was an unbelievable night with some awesome entertainment and recognition. I haven't laughed so hard in a while. I had been nominated to submit a portfolio to the first photography awards, the Triple "S" Award, in which the work had to represent the "achievement in the creative advancement of image making as an art form", and made within the school year. You can see the pieces that I submitted here. After the nominees submitted their portfolios, my photography teacher sent them out to successful photographers in the business, who then looked at each of the portfolios. They each gave three points to the portfolio that they felt deserved first place, two points for second, and one for third. Not only did the winner receive the most points total, but the winner also received the most "threes".

Well, I suppose you've already guessed it ... I got the award! I couldn't even believe it when my name was called, and I still can hardly believe it happened. It's very uplifting to have my work be recognized as an art form, especially since I have been struggling with this recently, and especially from people who are successful photographers. My teacher gave me their comments on my work, and I was so thankful and over the moon from their kind words. I just wanted to send a special thank you to everyone who has been so supportive of me and my work and my journey, whether you left an encouraging word, modeled for me, allowed me to shoot your senior or wedding photos, or even bought my work. You are the best and I will forever be thankful for you. Thank you!

Now I will be able to look at this award and remember that my work is something special, and I will remember everyone who supports me and it will give me strength to push on.


Have a fantastic day everyone!


Thursday, April 25, 2013

discovering


everything: borrowed


Happy Friday all! I've been enjoying this nice little blogging break for the past few days, especially since we have been having really awesome weather. I've been wearing shorts nonstop and actually right now I'm outside hanging out with all my friends. It's hard to believe that we will have to be apart for four months in just a week. I'm going to miss them a whole bunch, but we are planning on having google+ chats often. Thankfully I'll be busy with my internship, so I won't have too much time to sit around and be lazy and bored. I'm hoping to explore my favorite places over the duration of the summer, taking photos and making a short film about Alaska. We shall see what actually occurs though. I tend to get ideas in my head and then start working on them, but I never finish them, so cross your fingers!


So this week, I signed the contract to sell stock photos through a stock company. I was super excited when I got the email of approval after sending them my website, and now I just have to begin the process of submitting photos. It's all really new and exciting. My friends all signed model releases and I'm planning on getting a business license for my photo business this summer. I've been taking lots of photos (the photos from this outfit shoot are just supplements to a main piece I shot yesterday) and emailing people about different opportunities in the works and it's all so exciting. This summer will be a good one.


Have an awesome weekend everyone!

p.s. Megan interviewed me for her new blogger of the moment series, so be sure to check out the post here!


We're gonna have a good day!


Just quickly popping in to leave you guys with this song. Matt reminded me of its existence and I just wanted to share it with you. It's been a fantastic week, with hot weather, lots of good news, lots of good friends, and many adventures.

Hope you have a good day!


Monday, April 22, 2013

t + j


The other day I got to make a couple photos with my floormate and her boyfriend. Aren't they just the cutest? You can check out more photos on my facebook page, and if you live in Anchorage, I'm available for shoots during the summer! You can go here for more details.

Have a great day!


Sunday, April 21, 2013

my week in instagram #43


It's been a really fun week, filled with making photo props, shooting, going to senior portfolio reviews, going to film festivals, looking at cool animals, and getting lost in an art museum. Next week will be really hectic, as it is the last week of regular classes, so I warn you right now that I'll probably be missing for a couple days. Never fear though, after this week and the next, it's summer!

You can follow all my instagram pictures @impulsings !


Saturday, April 20, 2013

film friday (on saturday): dove real beauty sketches


I'm sure many of you have seen this by now, but I still wanted to share it. Matt sent it to me a little bit after it was posted, and I really loved the message behind it. Despite all the controversy that it's gotten (some people saying that it doesn't cater to different body types, some saying that it puts too much emphasis on physical beauty, blah blah), we have to keep in mind the message behind it. No matter what, physical beauty will always be judged. And while I think people put too much time and worry into making themselves look a certain way to please other people, we can't just push aside our physical qualities. I mean, our bodies are meant to be celebrated and we should celebrate our natural beauty. What I really love about this video is that it shows how much too critical we are of ourselves, and how the rest of the world actually sees us. You are so much more beautiful than you know. And it's the inner beauty that really shines on the outside.

So don't forget that you are beautiful, despite what you may think. Because there are people who see you and they see an amazing person with joy and happiness radiating from within, and that's what really makes you beautiful.

Have a wonderful day.


Friday, April 19, 2013

tutorial: how to edit outfit photos

+ how to do photo expansions, add a vignette, and add backlighting


Today I'm going to show you how I edit my main outfit photo from start to finish. First of all, I shoot with a Canon t3i and 50mm 1.8 lens, use a tripod and remote, and edit with photoshop cs6 and a wacom tablet. Second of all, you can do this tutorial with any kind of camera and any kind of editing software. There's tons of free editing programs, and I believe photoshop cs2 is now available for free, so there are endless possibilities. As for cameras, you can even do this with a point and shoot. Perhaps it won't be as blurred as other, more expensive cameras, but you can even do blurs in photoshop. I did my entire first 365 with a $75 point and shoot, so you have no excuse! ;) Never let equipment get in the way of your creativity.


Let's begin! Here is the photo, completely unedited, in all it's glory. It's a good picture and there's nothing wrong with it, but because the camera is a machine, sometimes it doesn't capture how we remember things. So photoshop is great to fix those machinery imperfections. That's how I see using photoshop to touch up realistic pictures.


Step one: first I use the crop tool (press "c" in photoshop) and expand the photo so that I am perfectly centered. Then I press the check button on the top bar to confirm the action.


Step two: then I go to image>canvas size and adjust my width to be perfectly square.


Step three: I had already taken two more photos of either side of my surroundings, and have them opened in photoshop. I use the move tool (press "v") and click on one photo and drag it over to the tab which then reveals my main photo. The second photo is now on a new layer (which you can see on the lower right side). I lower the opacity, which is on the right, right above the snapshot of the layers. Lowering the opacity allows me to line up the photo perfectly. This is also how you do the Brenier effect, which gives your photos a wide angle, shallow depth of field effect (which is actually impossible to achieve with a camera lens taking a single photo). You can do this effect on any photo, taking as many pictures to create your giant image. It's how I create most of my photos.


Step four: Then I add a layer mask by clicking the third inner button on the bottom right side. A layer mask is basically a forgiving way to erase parts of your photo. On a white layer mask (which is the default), a black paintbrush will erase, and a white paintbrush will unerase, so to speak. Don't worry if you don't quite understand it at first--it took me forever to figure out. I use the black paintbrush on the layer mask to erase the edges of my second photo, which allows for seamless transition.


Step five: Sometimes the photos don't line up perfectly and you get repeating patterns in the ground or treeline, so the warp tool (which is only available for cs6, sorry) really comes in handy. I literally just warp the layer to stretch so that the repeating patterns disappear.


Step six: for any white space, I use the clone tool ("s"). First I create a new layer (on the lower right side), then I use the clone tool. You hold down "alt" (or "option" if you have a mac) to sample the part of the photo that you want to clone, making sure that you can sample the current layer and below, which you can toggle on the top bar. Then you paint over the white space with the same texture around it.


(I also use the clone tool to clean up the background a bit, removing any distracting elements.)


Step seven: Then I use the desaturation tool (which is under the adjustments bar, the first one on the second row) to momentarily desaturate my photo. Then I use the curves tool (the one I actually circled in the picture) to change the contrast of shadows and highlights. Turning the photo black and white takes away the distraction of having color so that I can focus solely on the tones. You can use the hand tool to click and drag on any part of the photo that you want to make darker or lighter. Basically, with the curve line, the lower you drag it, the darker that particular tone gets. The left side deals with darker tones, and the right side deals with lighter tones. An "S" curve usually gives you nice contrast.


Step eight: I click the eye button next to my saturation layer to make it invisible, and you can already see a big difference in the photo.


Step nine: Then I create another curves layer. This one is to adjust individual colors. The curves line then for red, for example, deals with red and its opposite, cyan. Left still deals with shadows, and right with highlights. Raising a point on the line adds more red to that particular shadow or highlight, and lowering it adds more cyan. The opposite of green is magenta, and the opposite of blue is yellow.


Step ten: We are nearly done now. Next I add a vignette to the photo. I create a new layer, use the lasso tool ("L"), and draw a cloud figure around me. Now I have a nice selection layer. I go to select>inverse to then select everything but me.


Step eleven: Making sure my brush is set to black (or a dark brown color), I go to edit>fill, and fill my selection with the foreground color. Then I deselect by simply clicking on the photo. This will remove those blinking lines.


Step twelve: Then I go to filter>blur>gaussian blur, and generally do it to 333 pixels. This will blur the black border significantly.


Step thirteen: After that I change the mode on the layer to soft light and lower to the opacity to about 30%, depending on the photo. And now you have a nice vignette!


Step fourteen: This part is bonus, as I've just started doing this to my photos. To add some nice backlighting, choose a nice light color by clicking on the color box in the bottom left corner. Create a new layer, and paint a giant circle (adjust size by either using the size bar at the top left corner, or by pressing "]") on the layer. Change the mode to soft light.


Step fifteen: Then add another layer mask and paint black (ie erase) the color around your face and body. Then lower the opacity to your desired look.


Step sixteen: I then create a new layer and use the brush tool (you can change the color by holding down "alt" or "option" and clicking on whatever color within the picture you want) to remove any excess hairs that are sticking out.


Step seventeen: Then I go to layer>flatten image (yes, discard hidden layers), which puts all the layers together. This allows you to save the file as a jpeg. Save your photo ("ctrl" + "s") and you're good to go!


I hope this tutorial comes in handy for you. This is how I edit all of my outfit photos, and the outline for how I edit my more "creative" photos. If you have any questions or need clarification on anything, please don't hesitate to ask! And if there are any other tutorials you would like to see, let me know!

Have a great day!