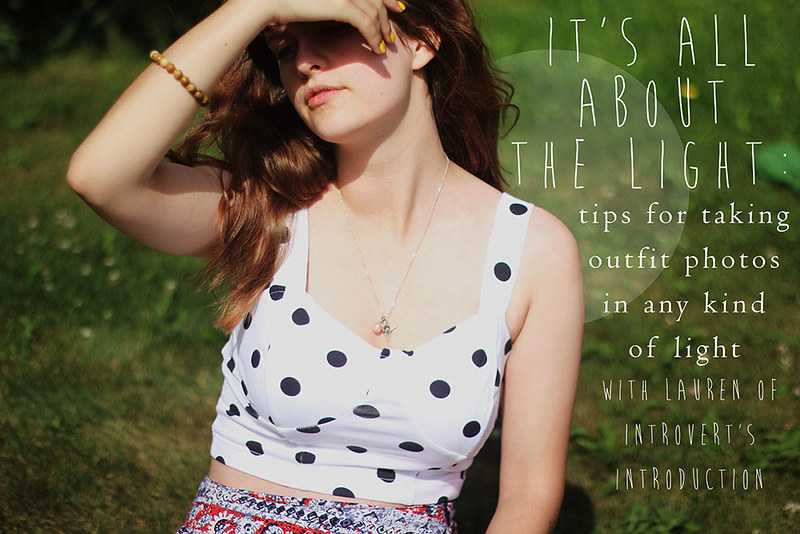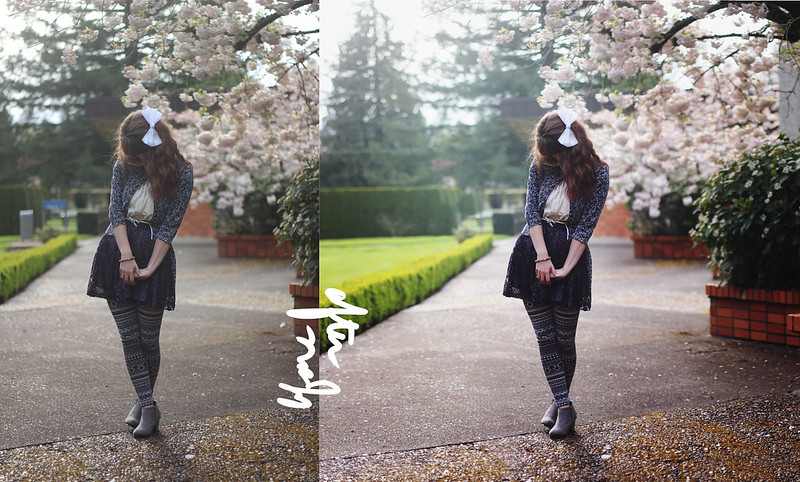
Today I'm guest blogging over at the etailPR blog, giving you guys some tips on how to shoot outfit photos in any kind of light! Be sure to check it out and leave the people of etailPR some love for letting me guest blog.
Have a marvelous day!

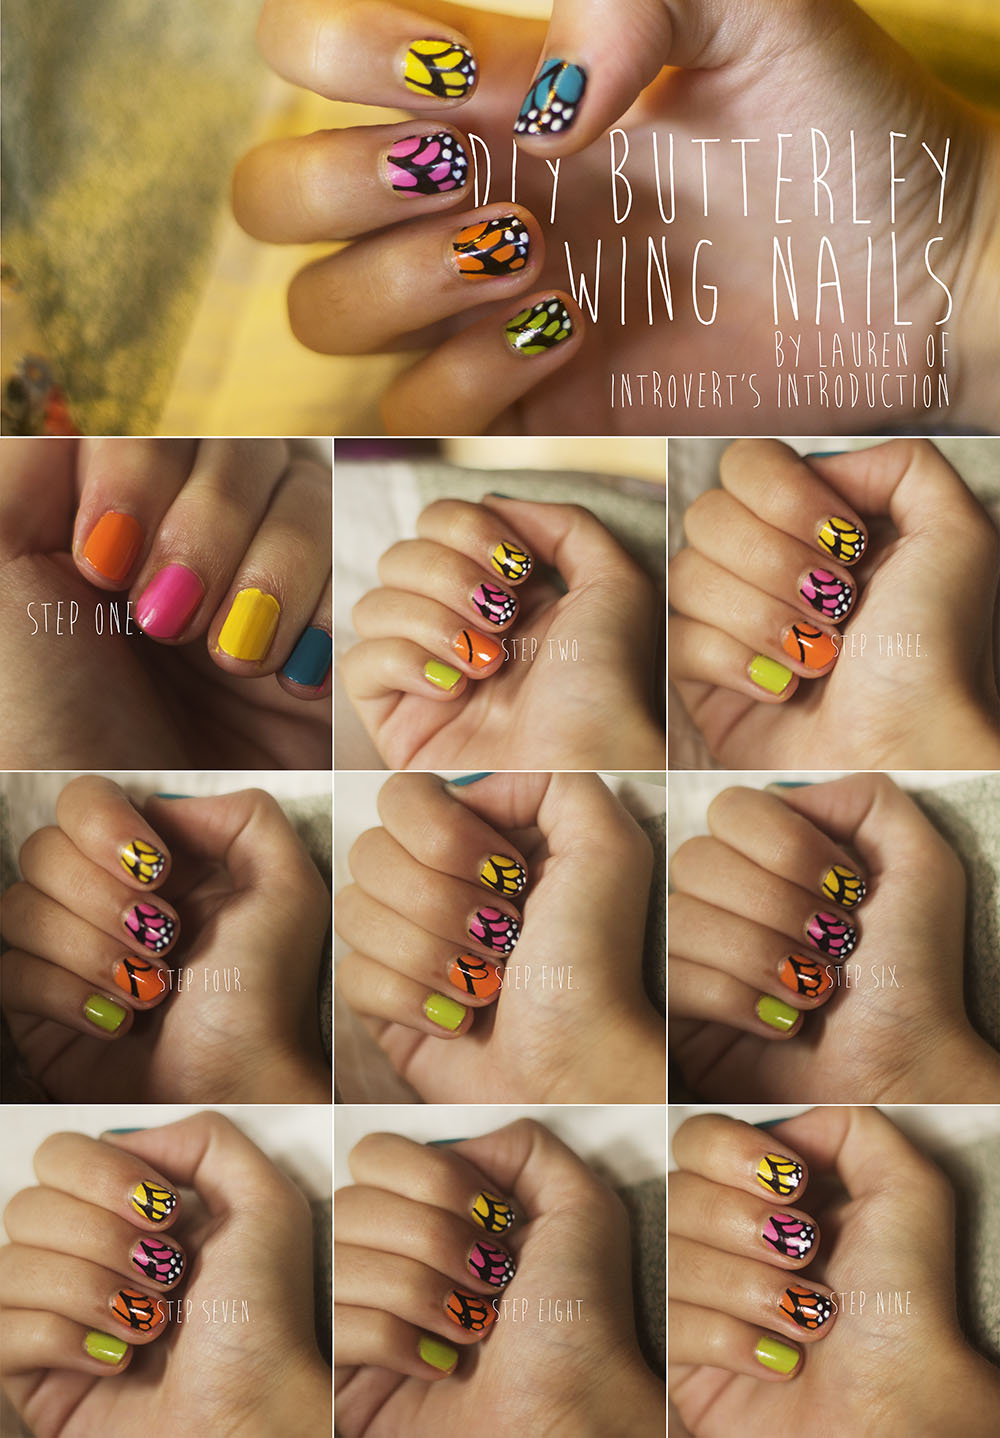
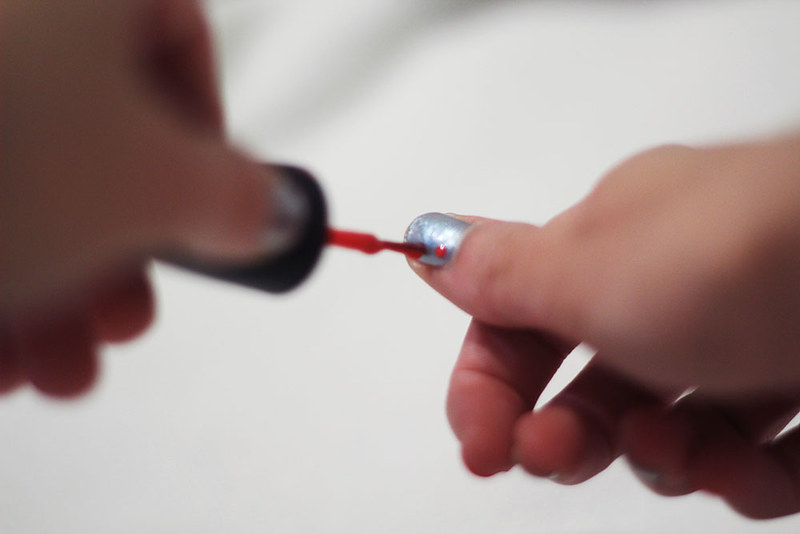
I'm so excited to share with you a fun nail diy! First of all, I must apologize for the blurriness of some of these photos. Left-handed Lauren + right-handed camera does not always get perfectly in focus photos. These are probably my favorite nails yet and they're so fun and colorful! I can never keep polish perfect on my nails for very long though as I'm always running around doing random things, so I didn't get to enjoy them very long. After you get the hang of creating this design, it's fairly easy, though time consuming, but I always do it in front of the tv as a relaxing thing to do.
First things first, I'm starting to be obsessed with the Milani brand. I've made it my personal mission in life to own all of their neon laquers because they're so fun and bright. For this design I used the Fresh Teal, Pink Hottie, and Totally 80's shades, as well as their Yellow Whiz fast dry polish. The orange was gifted to me (and at the moment I don't recall the brand, but it's not very good). For the white I used another random polish that I can't recall the brand of. For the black I actually used a Prismacolor premier pen that I had laying around, which is so much easier than black nail polish and a toothpick. For a topcoat I used good ol' Milani again.
Step one: Base coat! First of all, I always paint a clear coat underneath my base color so as not to stain my nail. For a design as crazy as this, you just have to go all out with the color and paint every nail a different one. It's only fitting.
Step two: Draw a curvy line from the middle of your cuticle to about 2/3 down the side of your nail.
Step three: Then draw a smaller curved line down to about the halfway point on the opposite side of your nail.
Step four: Thicken the first line just a bit.
Step five: Then you'll add the next section of the wing by drawing a slightly crooked "U" shape.
Step six: Create two more "U" shapes, making each one just a little bit smaller.
Step seven: Following the connecting line of the last two "U" shapes, you'll draw a slight diagonal line to the 1/3 point of the remaining negative space.
Step eight: Then draw two curving lines on either side of the diagonal line.
Step nine: Fill in the remaining space, and add polka dots!
Step ten: Then simply add your top coat. If you go the sharpie/pen route like I did, there will be a bit of bleeding from the pen reacting with the top coat. Once the top coat dries, just touch up a bit on your color, add another top coat, and you'll be good to go!
If you have any questions about this tutorial, please don't hesitate to leave a comment or shoot me an email.
Have a great day!

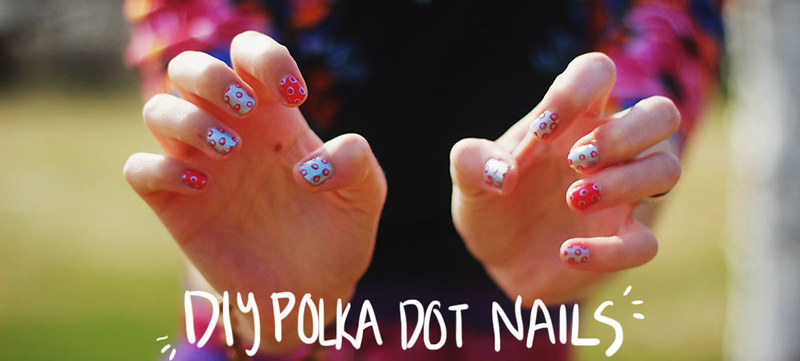
Today I'm bringing you guys a really simple nail tutorial! People ask me all the time how I do my polka dot nails, and really it's quite simple. I went through a phase of my life where I painted my nails all the time, and then one day I switched my lifestyle and didn't do my nails, didn't wear makeup, and didn't use any products on my skin or hair (except for shampoo and sculpting cream, since this was when I had short hair), and then just as quickly as I stopped using products, I started using them again. Now though, I'm pretty minimal when it comes to things, and still try to maintain a level of naturalness, I guess you could say. Painting my nails is one of those things that I'm glad I'm doing again. Firstly, it's really therapeutic. I love painting, and being able to paint right on myself, however weird that sounds, is a pretty cool thing. It's also a fun way to express myself and add extra color. So now I shall reveal the deep secrets of polka dot nails.

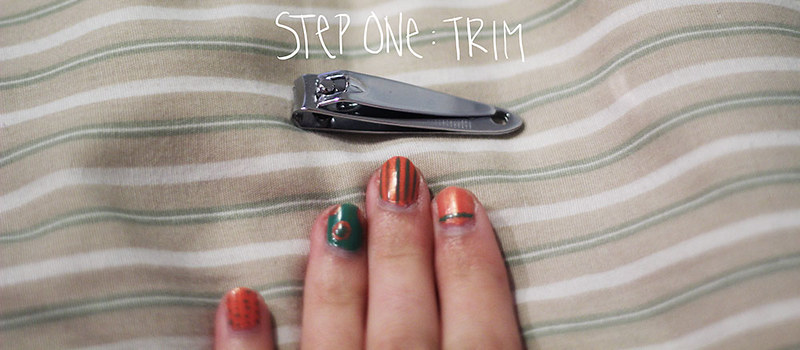
Step one: trim
Pictured is nail polish that is starting to chip. That's the sign that I probably should repaint. I paint my nails about once a week, as I'm always doing things with my hands and the paint chips off pretty quickly. First I trim my nails. This step is dependent upon how long my nails are. I hate having long fingernails and like to keep them as short as possible. Plus with short nails you get less dirt and junk underneath the tips.

Step two: remove
Then I use a cotton ball and remove all the nail polish from my nails. After I'm dong removing the polish, I was my hands with soap and water and sometimes put lotion on my hands.

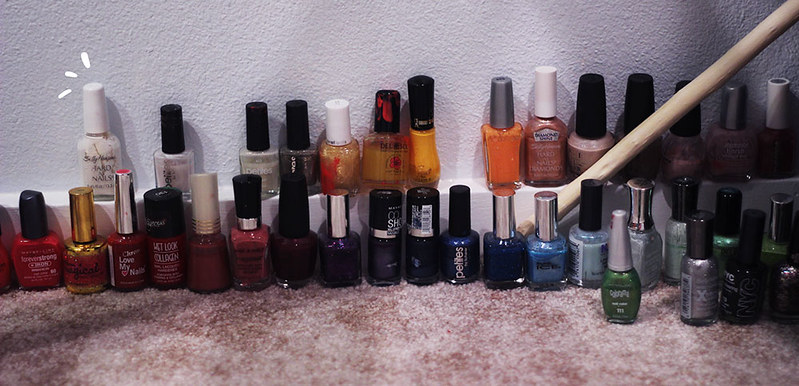
Next I pick out my polish. This is my entire collection of colors minus a few bottles. Eventually I would love to add more shades and end up with a huge selection like Kaylah, but for now I am pleased with how much it's grown over the years.

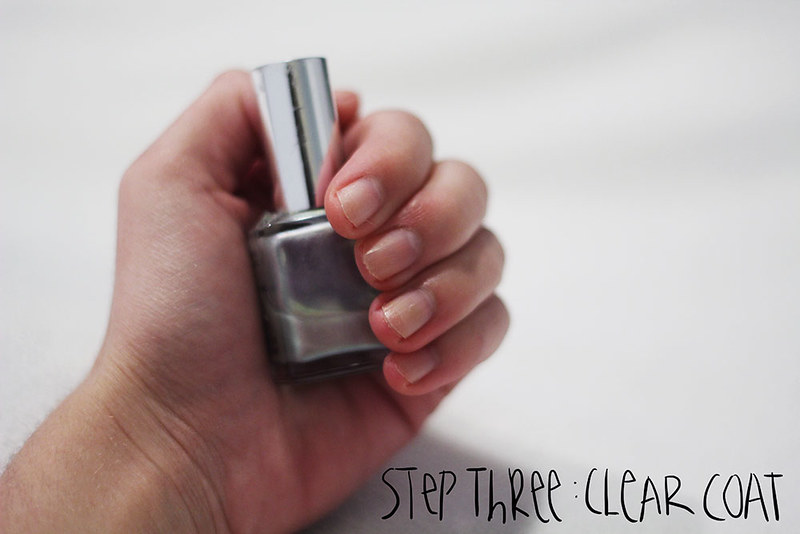
Step three: clear coat
Before I paint any actual color on, I paint a clear coat. That way my nails don't get stained with whatever color I put on them. Especially during the summer, I like doing cut out designs where you can see parts of the nail, and having nasty orange nails is never a good thing. Currently I'm actually out of clear coat, so for this tutorial I used a translucent shade of silver/gray.

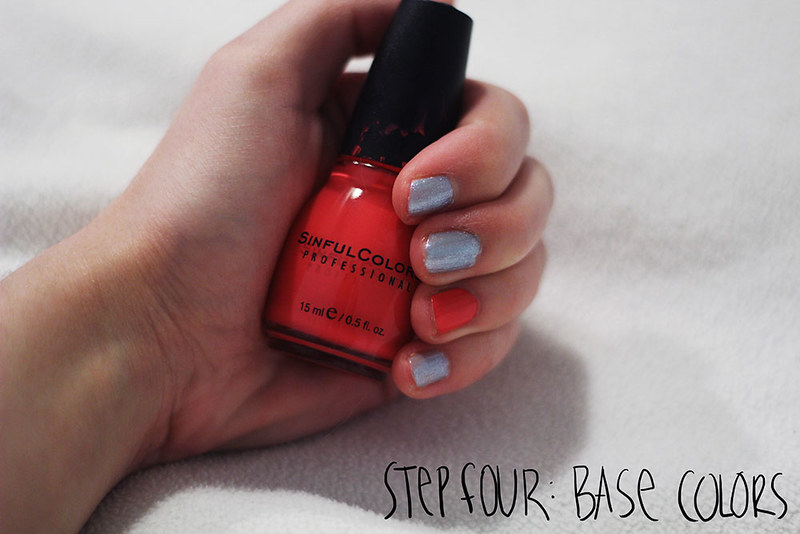
Step four: base colors
I like to alternate my colors on my fingers. Generally on my right hand I paint my index finger and my pinky, and on my left hand I paint my ring finger. The very first time I ever alternated colors, I painted my middle finger, and only realized later the implications. Whoopsies!

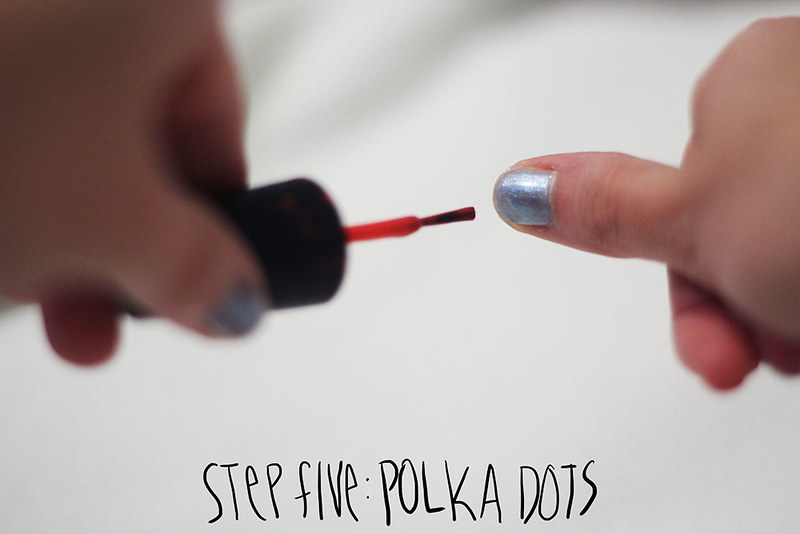
Step five: polka dots
Now on to the polka dots! Instead of using the side of your brush like you generally use to apply the base coat, you use the flat rounded bottom of your brush to make the polka dots. I try to leave a tiny bit of excess polish on the tip of the brush so the circles are nice and opaque. Just don't rush through it. These things take a steady hand.

After I painted the initial polka dots on, I went back and added smaller ones on top. You can do this several ways. I was extra careful and just used the brush of my polish, leaving less excess polish on and angling it slightly so that the entire bottom didn't touch the nail. You can also use a toothpick by using your brush to create a palette on your hand or a piece of paper to dip your toothpick in. Also, you can use a colored sharpie to create smaller circles. Just make sure with the sharpie that the polish is completely dry.

Once your nails are dry, simply add a top coat (if you used sharpie, you should note that running a top coat brush over it several times will cause it to start running), and you're done! Now you have really fun polka dot nails that everyone will be jealous of!
If you have any questions, feel free to ask them! And I would love to see your results of this tutorial. You can post a picture in the comments or email a link to a post.
I hope that you enjoyed this diy and that you have a great day!
+ how to do photo expansions, add a vignette, and add backlighting

Today I'm going to show you how I edit my main outfit photo from start to finish. First of all, I shoot with a Canon t3i and 50mm 1.8 lens, use a tripod and remote, and edit with photoshop cs6 and a wacom tablet. Second of all, you can do this tutorial with any kind of camera and any kind of editing software. There's tons of free editing programs, and I believe photoshop cs2 is now available for free, so there are endless possibilities. As for cameras, you can even do this with a point and shoot. Perhaps it won't be as blurred as other, more expensive cameras, but you can even do blurs in photoshop. I did my entire first 365 with a $75 point and shoot, so you have no excuse! ;) Never let equipment get in the way of your creativity.

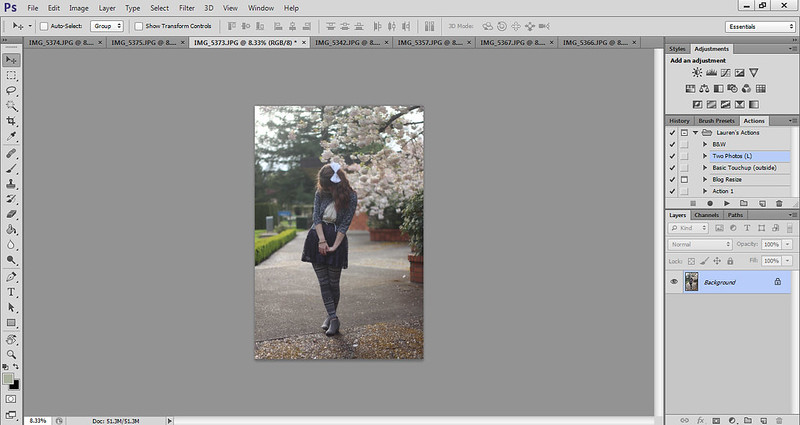
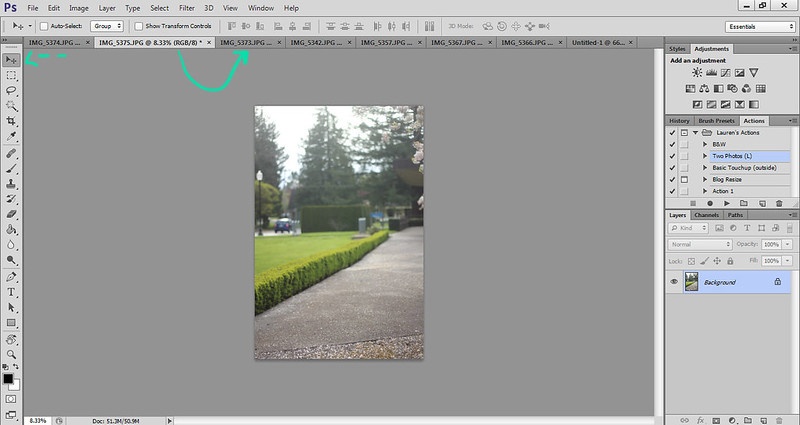
Let's begin! Here is the photo, completely unedited, in all it's glory. It's a good picture and there's nothing wrong with it, but because the camera is a machine, sometimes it doesn't capture how we remember things. So photoshop is great to fix those machinery imperfections. That's how I see using photoshop to touch up realistic pictures.

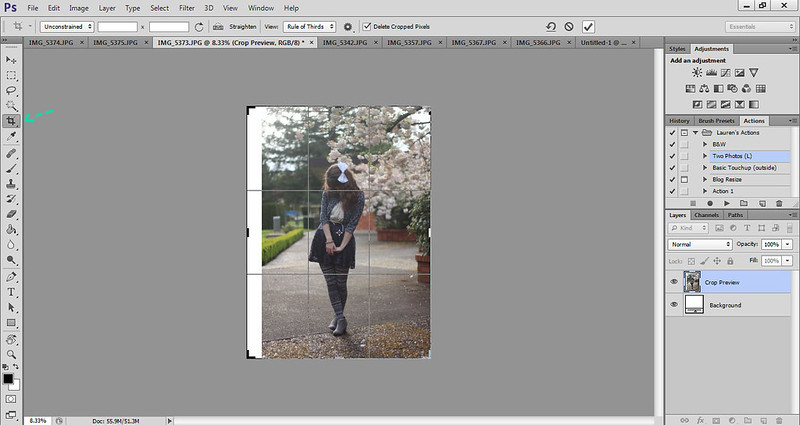
Step one: first I use the crop tool (press "c" in photoshop) and expand the photo so that I am perfectly centered. Then I press the check button on the top bar to confirm the action.

Step two: then I go to image>canvas size and adjust my width to be perfectly square.


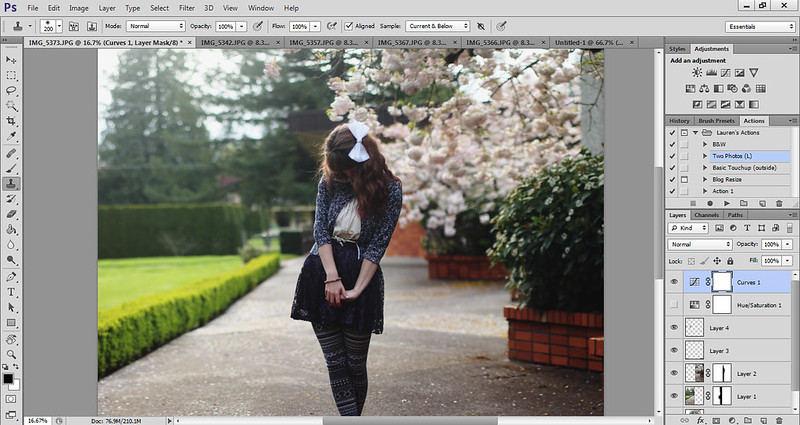
Step three: I had already taken two more photos of either side of my surroundings, and have them opened in photoshop. I use the move tool (press "v") and click on one photo and drag it over to the tab which then reveals my main photo. The second photo is now on a new layer (which you can see on the lower right side). I lower the opacity, which is on the right, right above the snapshot of the layers. Lowering the opacity allows me to line up the photo perfectly. This is also how you do the Brenier effect, which gives your photos a wide angle, shallow depth of field effect (which is actually impossible to achieve with a camera lens taking a single photo). You can do this effect on any photo, taking as many pictures to create your giant image. It's how I create most of my photos.

Step four: Then I add a layer mask by clicking the third inner button on the bottom right side. A layer mask is basically a forgiving way to erase parts of your photo. On a white layer mask (which is the default), a black paintbrush will erase, and a white paintbrush will unerase, so to speak. Don't worry if you don't quite understand it at first--it took me forever to figure out. I use the black paintbrush on the layer mask to erase the edges of my second photo, which allows for seamless transition.

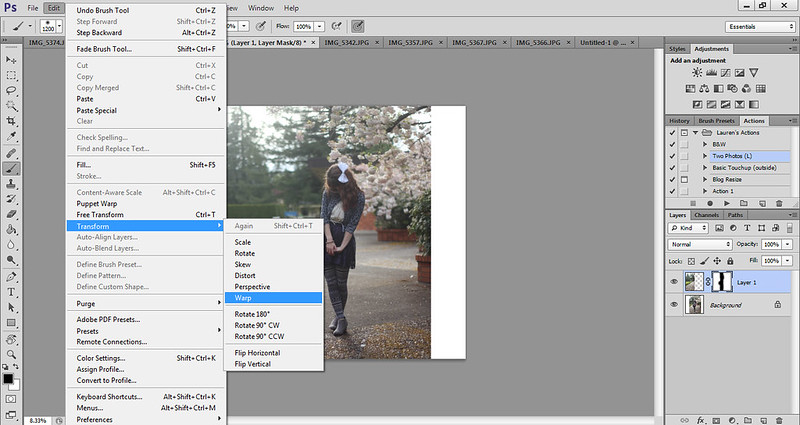
Step five: Sometimes the photos don't line up perfectly and you get repeating patterns in the ground or treeline, so the warp tool (which is only available for cs6, sorry) really comes in handy. I literally just warp the layer to stretch so that the repeating patterns disappear.

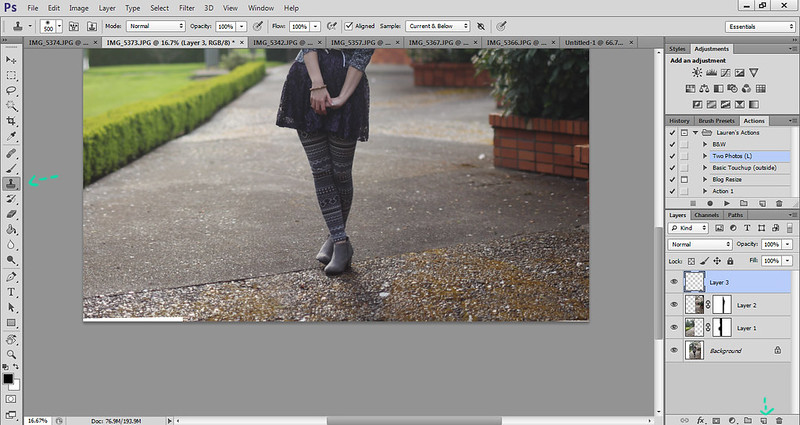
Step six: for any white space, I use the clone tool ("s"). First I create a new layer (on the lower right side), then I use the clone tool. You hold down "alt" (or "option" if you have a mac) to sample the part of the photo that you want to clone, making sure that you can sample the current layer and below, which you can toggle on the top bar. Then you paint over the white space with the same texture around it.

(I also use the clone tool to clean up the background a bit, removing any distracting elements.)


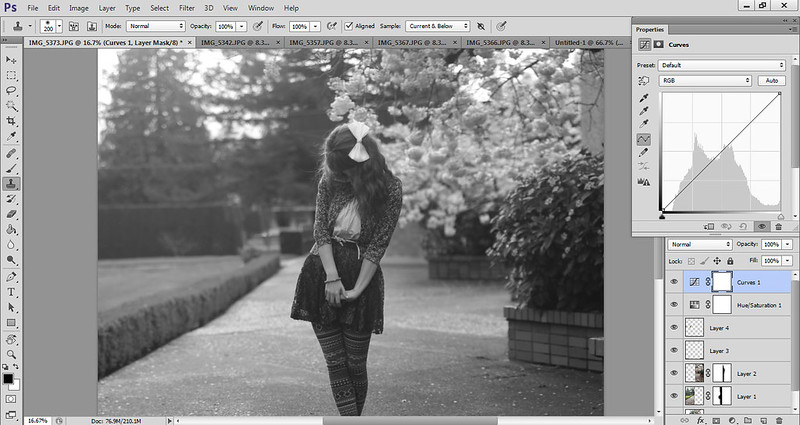
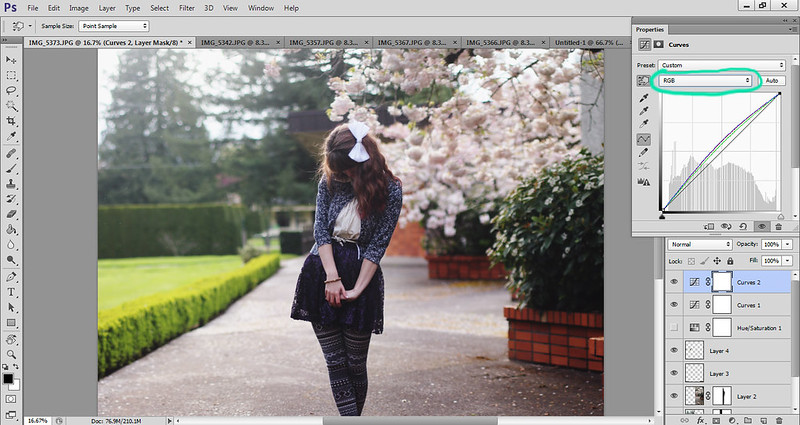
Step seven: Then I use the desaturation tool (which is under the adjustments bar, the first one on the second row) to momentarily desaturate my photo. Then I use the curves tool (the one I actually circled in the picture) to change the contrast of shadows and highlights. Turning the photo black and white takes away the distraction of having color so that I can focus solely on the tones. You can use the hand tool to click and drag on any part of the photo that you want to make darker or lighter. Basically, with the curve line, the lower you drag it, the darker that particular tone gets. The left side deals with darker tones, and the right side deals with lighter tones. An "S" curve usually gives you nice contrast.

Step eight: I click the eye button next to my saturation layer to make it invisible, and you can already see a big difference in the photo.

Step nine: Then I create another curves layer. This one is to adjust individual colors. The curves line then for red, for example, deals with red and its opposite, cyan. Left still deals with shadows, and right with highlights. Raising a point on the line adds more red to that particular shadow or highlight, and lowering it adds more cyan. The opposite of green is magenta, and the opposite of blue is yellow.

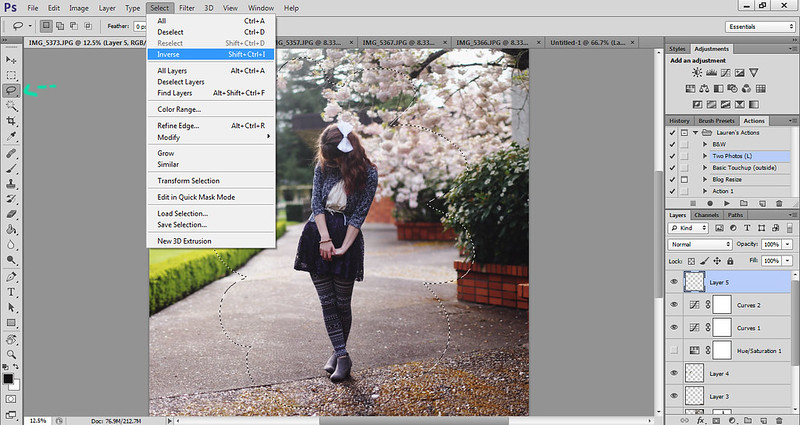
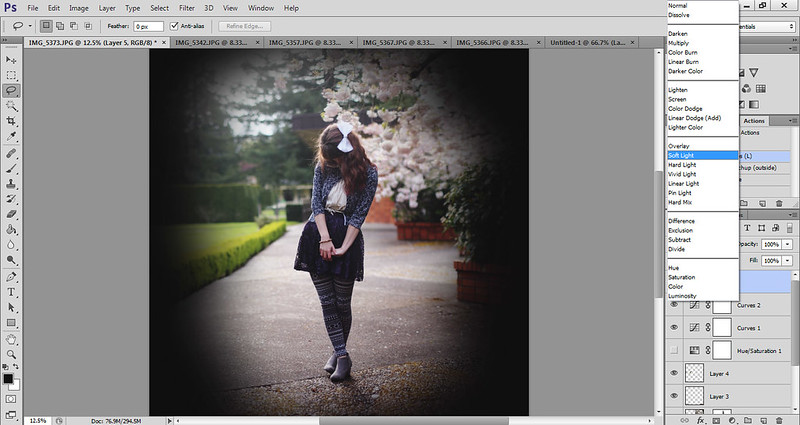
Step ten: We are nearly done now. Next I add a vignette to the photo. I create a new layer, use the lasso tool ("L"), and draw a cloud figure around me. Now I have a nice selection layer. I go to select>inverse to then select everything but me.

Step eleven: Making sure my brush is set to black (or a dark brown color), I go to edit>fill, and fill my selection with the foreground color. Then I deselect by simply clicking on the photo. This will remove those blinking lines.

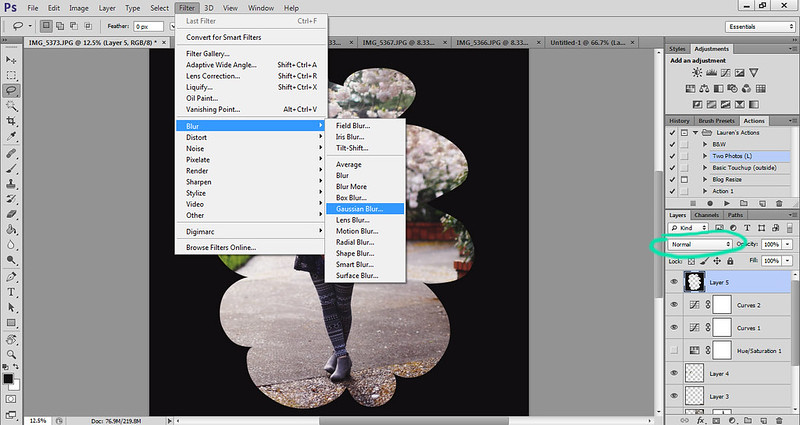
Step twelve: Then I go to filter>blur>gaussian blur, and generally do it to 333 pixels. This will blur the black border significantly.

Step thirteen: After that I change the mode on the layer to soft light and lower to the opacity to about 30%, depending on the photo. And now you have a nice vignette!

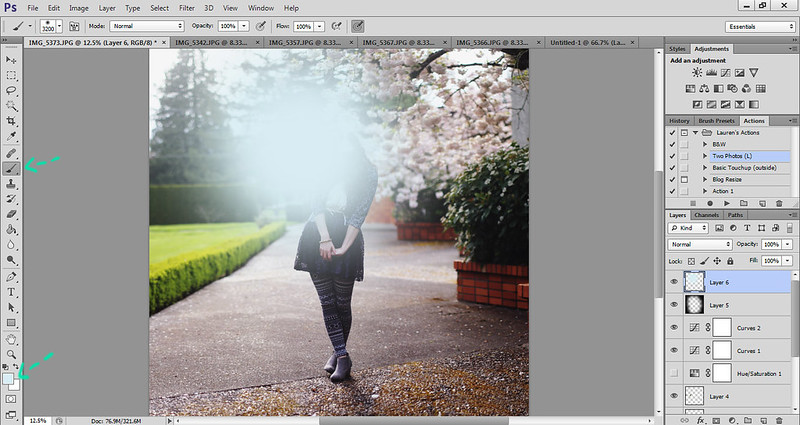
Step fourteen: This part is bonus, as I've just started doing this to my photos. To add some nice backlighting, choose a nice light color by clicking on the color box in the bottom left corner. Create a new layer, and paint a giant circle (adjust size by either using the size bar at the top left corner, or by pressing "]") on the layer. Change the mode to soft light.

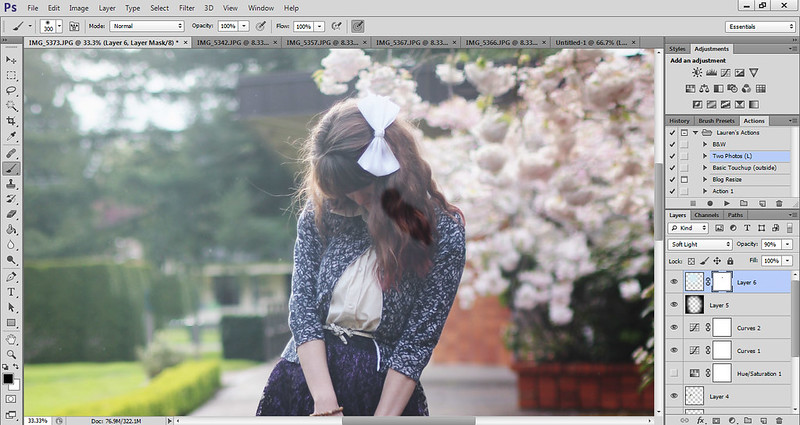
Step fifteen: Then add another layer mask and paint black (ie erase) the color around your face and body. Then lower the opacity to your desired look.

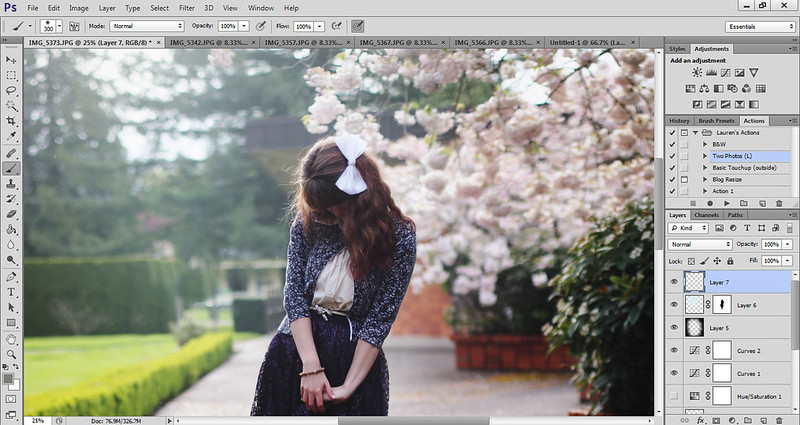
Step sixteen: I then create a new layer and use the brush tool (you can change the color by holding down "alt" or "option" and clicking on whatever color within the picture you want) to remove any excess hairs that are sticking out.

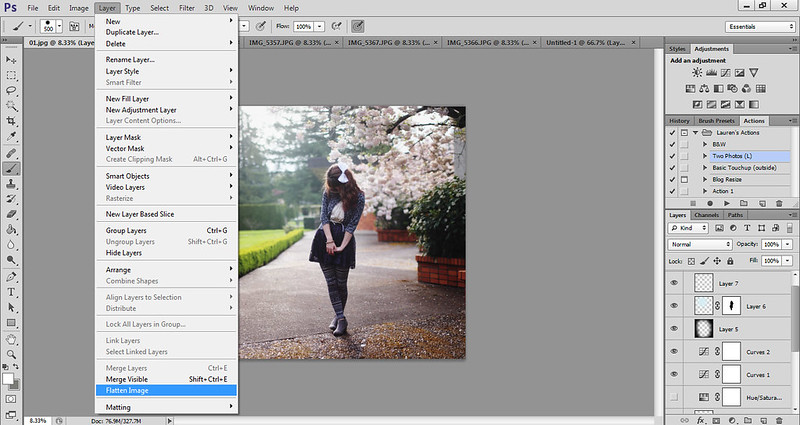
Step seventeen: Then I go to layer>flatten image (yes, discard hidden layers), which puts all the layers together. This allows you to save the file as a jpeg. Save your photo ("ctrl" + "s") and you're good to go!
I hope this tutorial comes in handy for you. This is how I edit all of my outfit photos, and the outline for how I edit my more "creative" photos. If you have any questions or need clarification on anything, please don't hesitate to ask! And if there are any other tutorials you would like to see, let me know!
Have a great day!

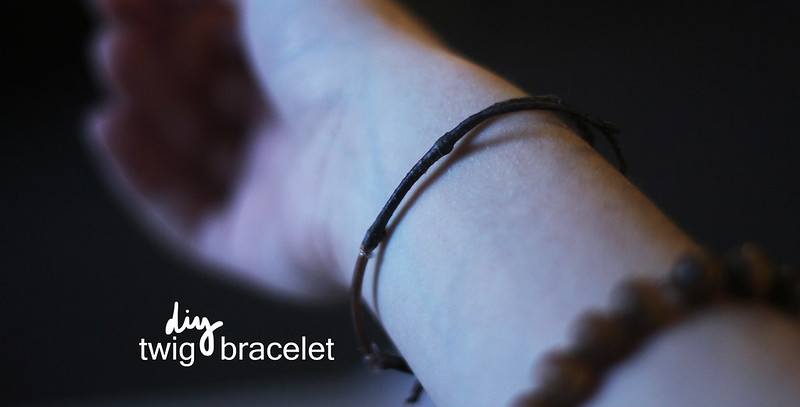
Today I'm bringing you a super fun diy that is really easy to do and costs virtually no money. It's the diy twig bracelet, and it's an awesome way to combine the great outdoors with more modern, metallic feelings.

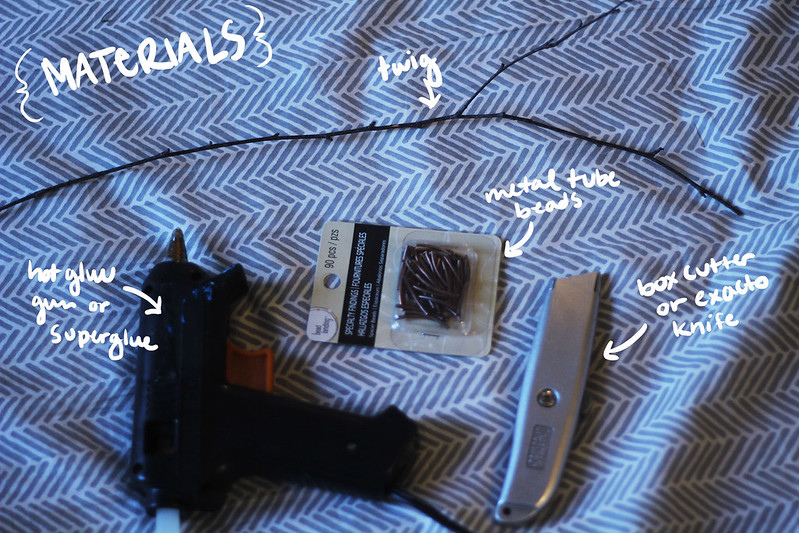
First and foremost, there is a list of materials you will need:
1. Twig of considerable length, preferably wet from the rain (It has to go around your wrist at least once and will need to be formed into a circular shape.)
2. Metal tube beads (I got mine at Michael's for about $3. Just make sure the holes are thick enough for the twig to be able to go through.)
3. Box cutter or exacto knife
4. Hot glue gun or super glue (Super glue will work better, but I didn't have any on hand so I used a glue gun.)
step one; measure your wrist.
This is a pretty straightforward step. Make sure you'll be able to get the bracelet on and off easily. You should gently mold the twig into the rounded shape that you desire, as it is easily breakable at this stage.. Then cut the twig at the appropriate length.

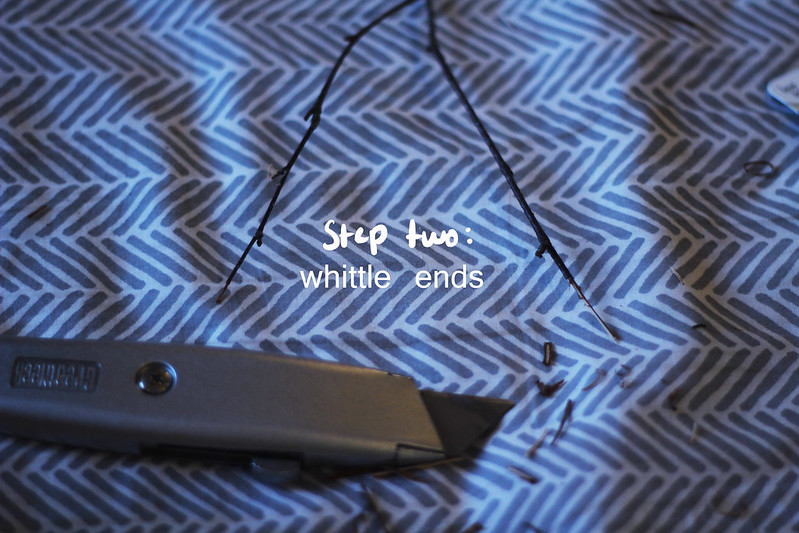
step two; whittle ends.
Trim down both ends of the twig so that they fit nice and comfortably in the bead. Each end should take up half the space in the bead, so that when you glue everything together, both sides will be attached securely.

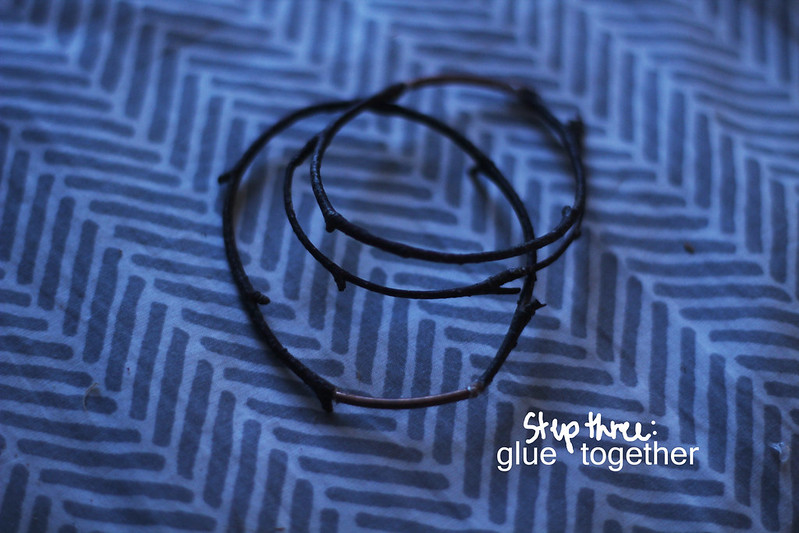
step three; glue together.
Take one whittled end of the twig, put hot glue/super glue on the end, and slide it into the bead. Seal it with a little bit of glue. Allow it to dry, and then do the same thing do the other end.

And there you go! You have a beautiful twig bracelet that all your friends will be jealous of. If you have any questions, please don't hesitate to ask.
Have a great day!

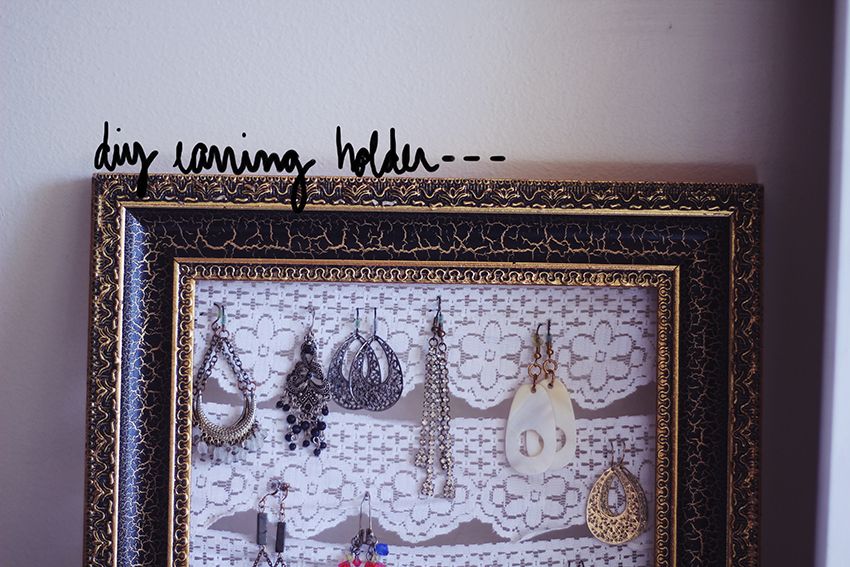
The other day I was visiting my friend Marina's dorm, and she had the coolest earring holder ever. My favorite part about it? She made it! She had used a clothes hanger and lace fabric to make it, and I thought it would be really easy to create my own version of it. This project is super easy. It only takes about fifteen minutes and only cost me $1. The frame I got from a thrift store and I had the rest of the materials lying around my dorm room.

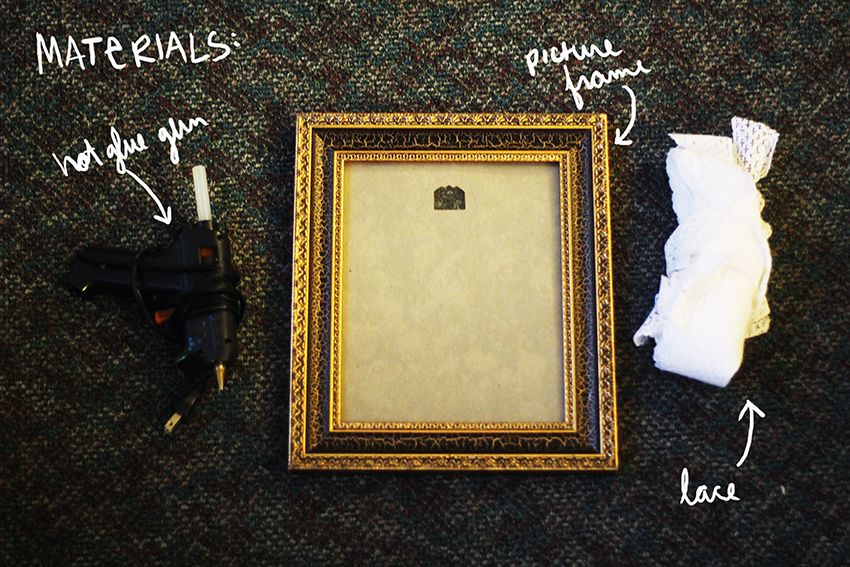
Materials: hot glue gun, lace ribbon (or fabric), a picture frame, and scissors.

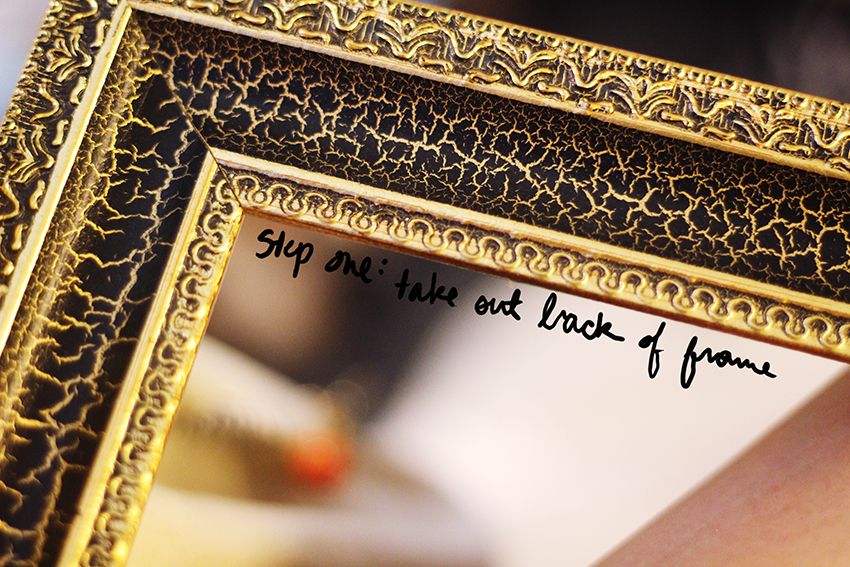
Step one: You need to remove the back and the glass from the frame. You won't need it for the project, so I have my glass tucked away waiting to be used for some other diy.

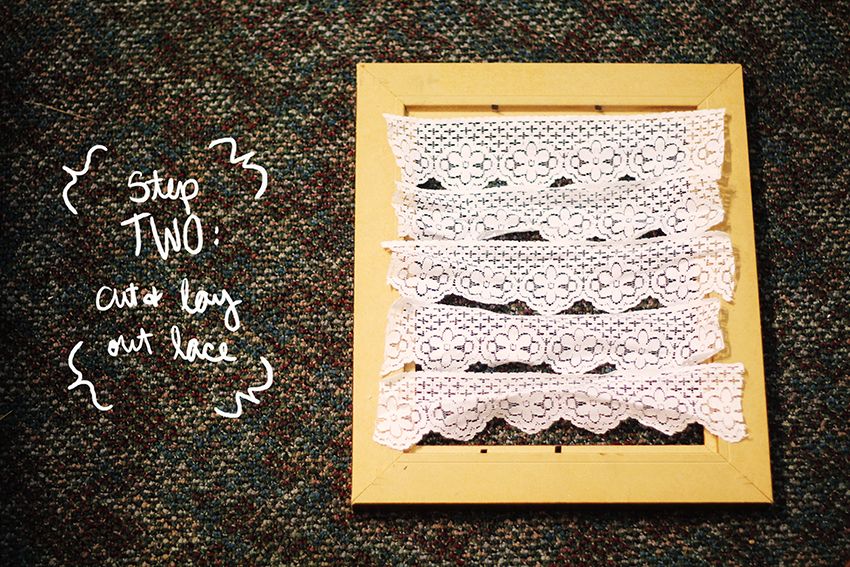
Step two: cut the lace and lay it out on the frame. You'll want to make sure the lace is actually long enough to glue onto the frame, and that you have enough pieces.

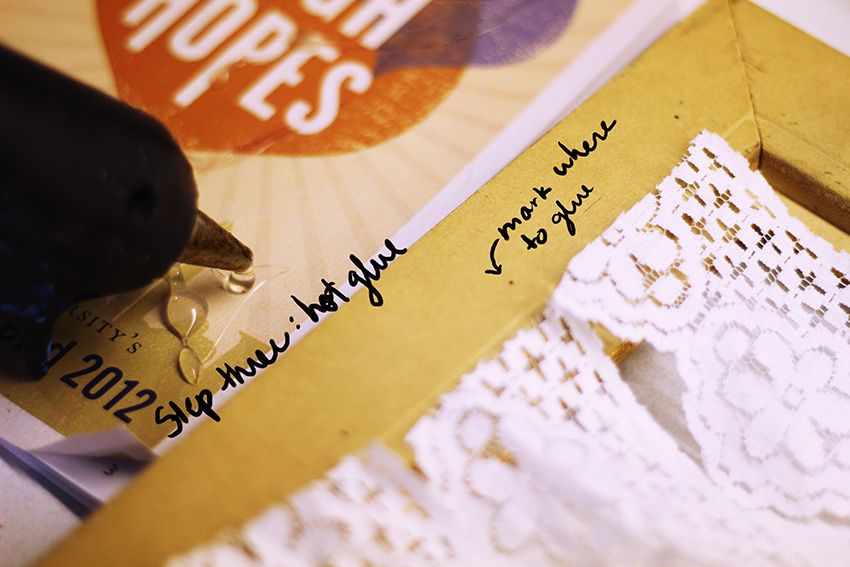
Step three: hot glue. Mark where your lace ends so that you can hot glue only where you need to. Glue one side first. Then glue the other, pulling the lace tightly so that it doesn't sag.

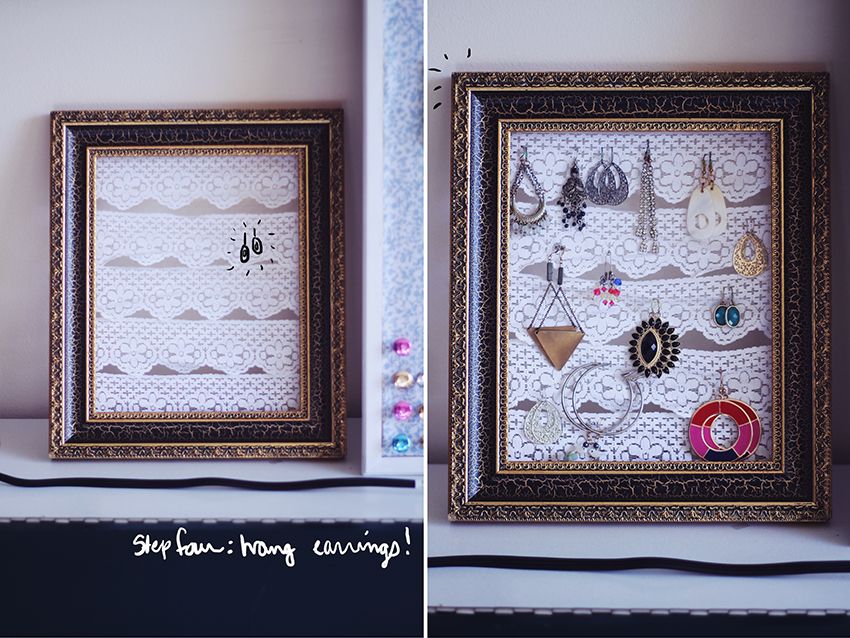
Step four: hang your earrings! When the glue is dry, you can hang up your earrings for proud display.
And that's all! Now you have a fancy earring holder that you can brag to all your friends about.
If you guys make this, you should totally email me a picture of it so that I can feature it on the blog!

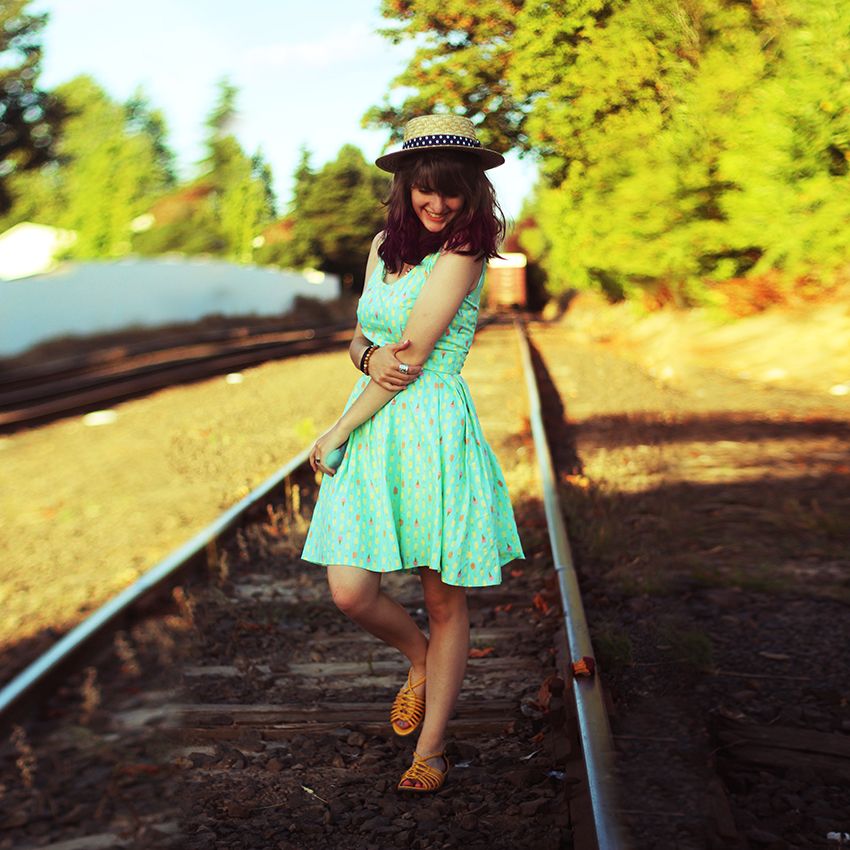
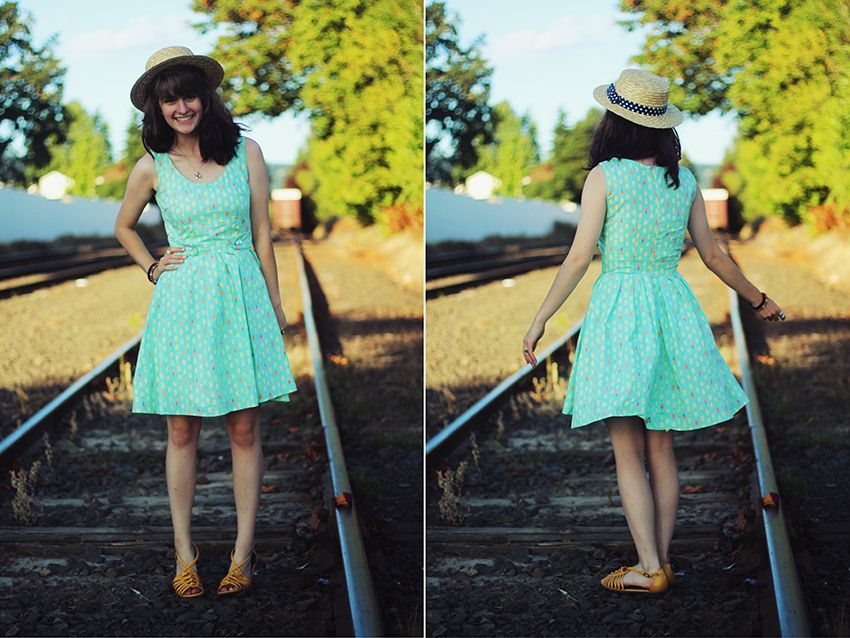
dress: diy // hat: forever 21 // shoes: famous footwear

Hey everyone! I'm super excited to show you my new hair! I've always wanted to dye my hair but my parents never let me (while I was living with them), so once I got to college of course I had to turn into a rebellious teenager and dye my hair! (Don't worry, my parents, even though they didn't really like the idea, said I could do it.) My roommate Annette did it for me in the dorm bathroom while the rest of our floor watched. It was definitely really exciting and scary because I have never dyed my hair before. But I absolutely love it! It's crazy enough to make a statement, but still somewhat professional-ish-kind-of-sort-of because it's not over-the-top purple. I'm in love.


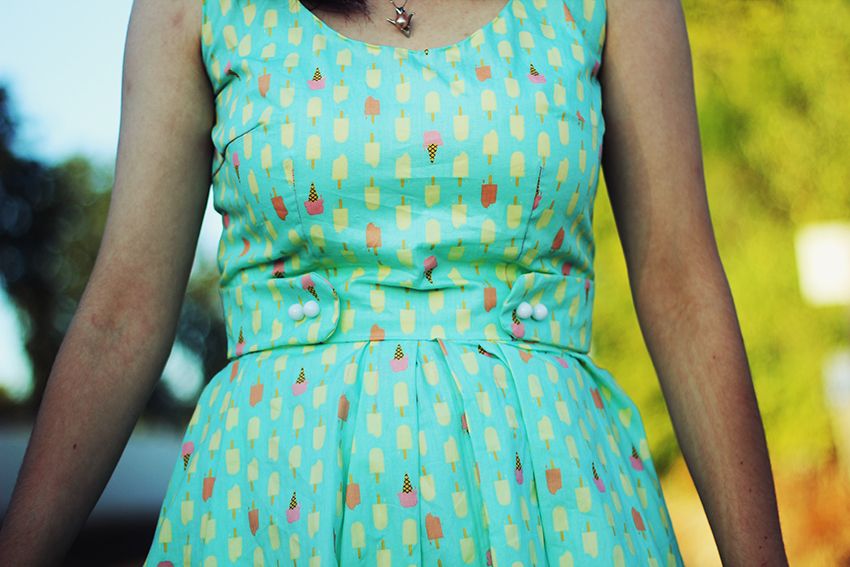
This is the first of two dresses I sewed over the summer (the second one still is incomplete), and I really love being able to wear something completely unique. Plus, who doesn't love wearing a cute ice cream/popsicle dress?

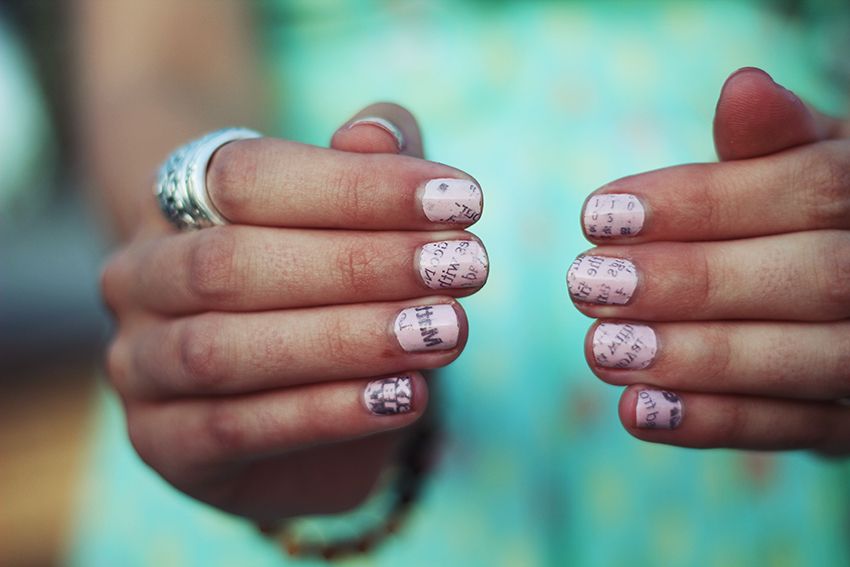
Also my friend Jenna showed me how to do newspaper nails! It's actually super easy. All you do is paint your nails, let them dry completely, then dip the nail in rubbing alcohol for about six seconds. Put the newspaper over it and hold it there for about twenty seconds, take it off, apply a top coat, and you're done! It's magic.

Hope you guys have an awesome day!
