Happy Friday all! I've been enjoying this nice little blogging break for the past few days, especially since we have been having really awesome weather. I've been wearing shorts nonstop and actually right now I'm outside hanging out with all my friends. It's hard to believe that we will have to be apart for four months in just a week. I'm going to miss them a whole bunch, but we are planning on having google+ chats often. Thankfully I'll be busy with my internship, so I won't have too much time to sit around and be lazy and bored. I'm hoping to explore my favorite places over the duration of the summer, taking photos and making a short film about Alaska. We shall see what actually occurs though. I tend to get ideas in my head and then start working on them, but I never finish them, so cross your fingers!
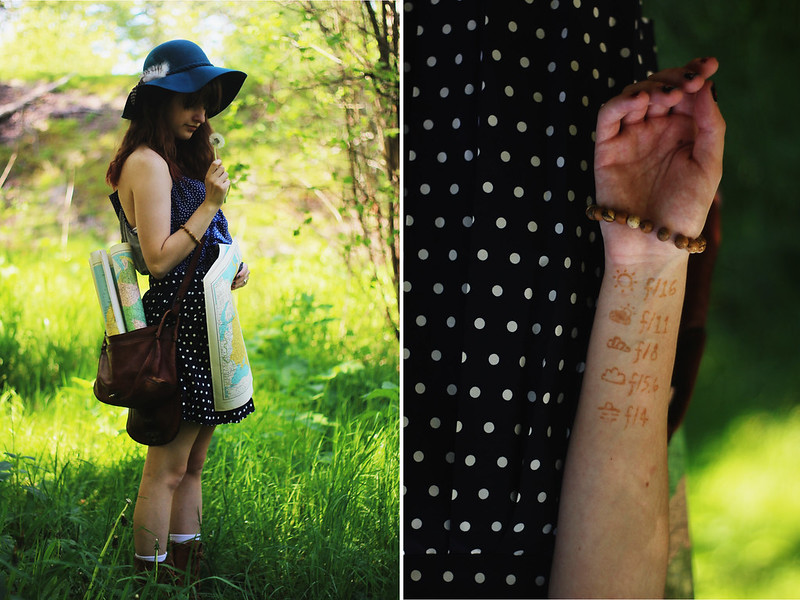
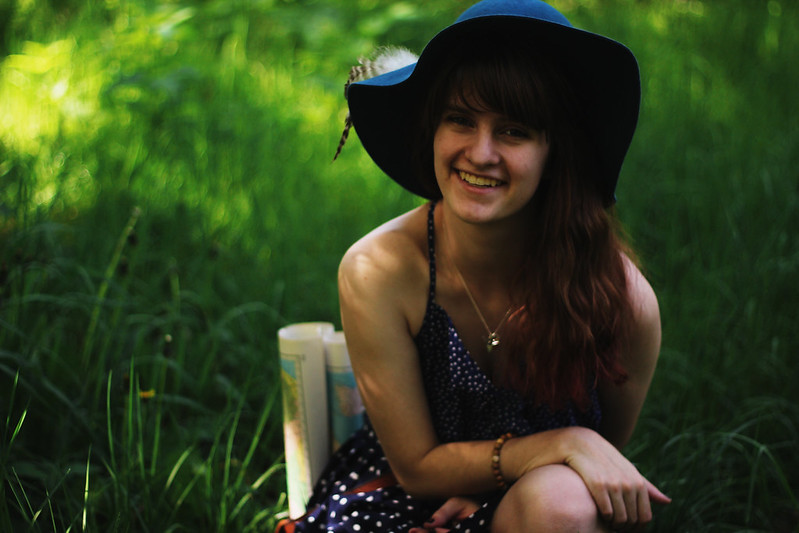
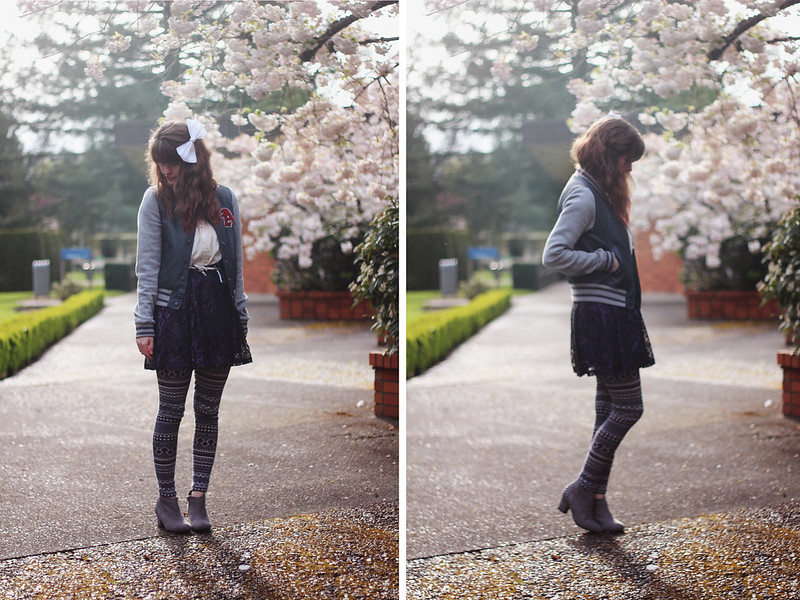
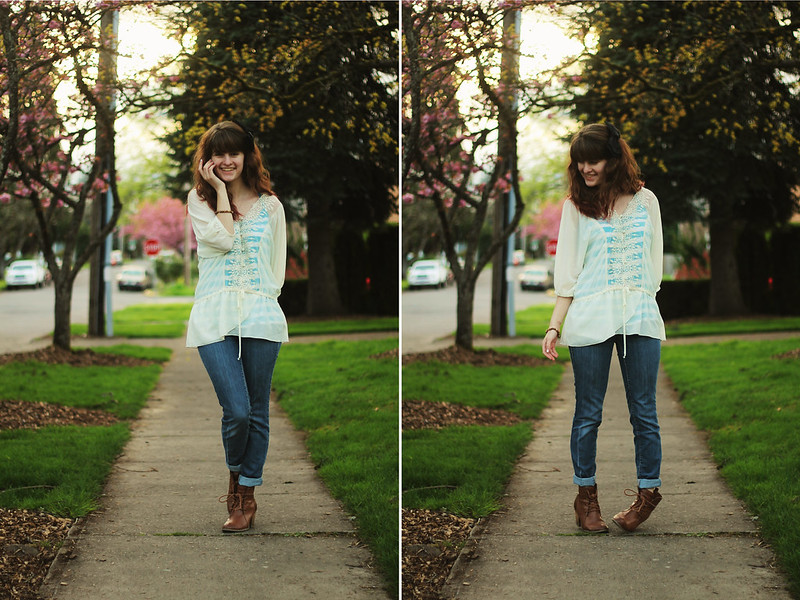
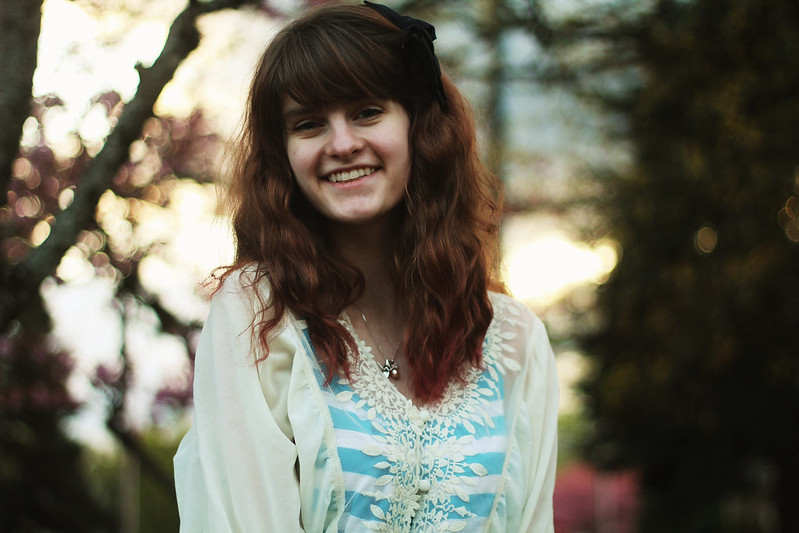
So this week, I signed the contract to sell stock photos through a stock company. I was super excited when I got the email of approval after sending them my website, and now I just have to begin the process of submitting photos. It's all really new and exciting. My friends all signed model releases and I'm planning on getting a business license for my photo business this summer. I've been taking lots of photos (the photos from this outfit shoot are just supplements to a main piece I shot yesterday) and emailing people about different opportunities in the works and it's all so exciting. This summer will be a good one.
Have an awesome weekend everyone!
p.s. Megan interviewed me for her new blogger of the moment series, so be sure to check out the post here!
Just quickly popping in to leave you guys with this song. Matt reminded me of its existence and I just wanted to share it with you. It's been a fantastic week, with hot weather, lots of good news, lots of good friends, and many adventures.
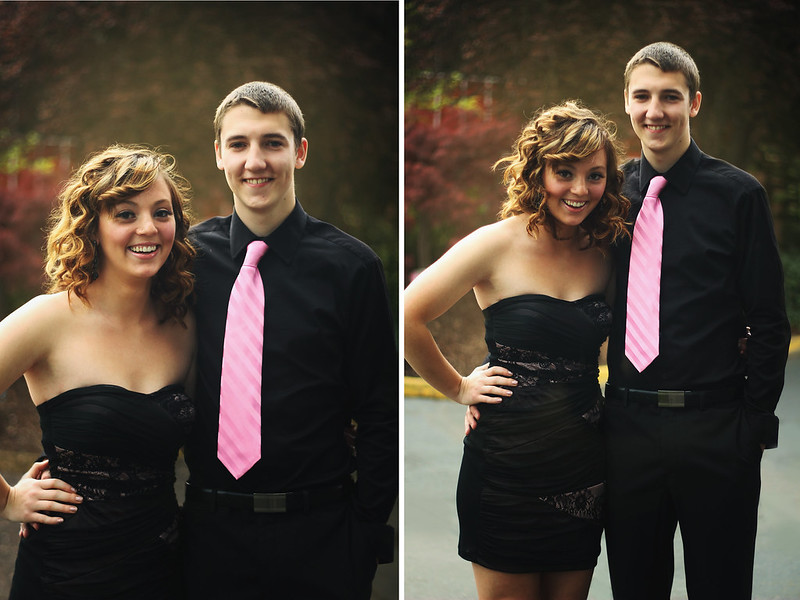
The other day I got to make a couple photos with my floormate and her boyfriend. Aren't they just the cutest? You can check out more photos on my facebook page, and if you live in Anchorage, I'm available for shoots during the summer! You can go here for more details.
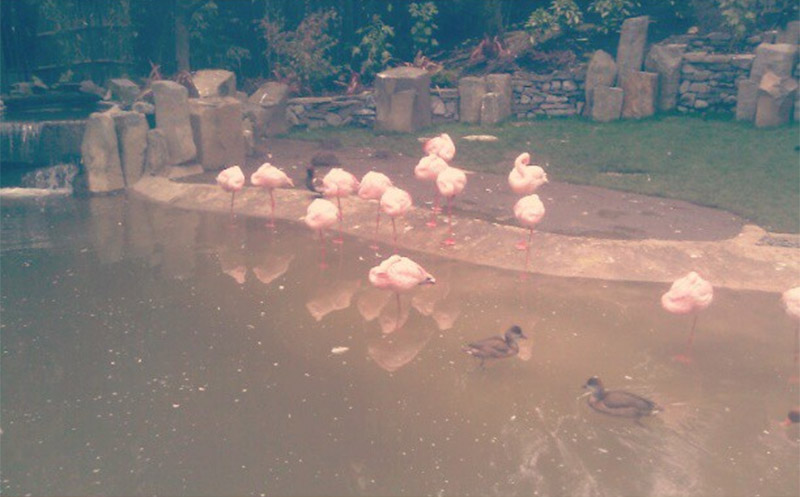
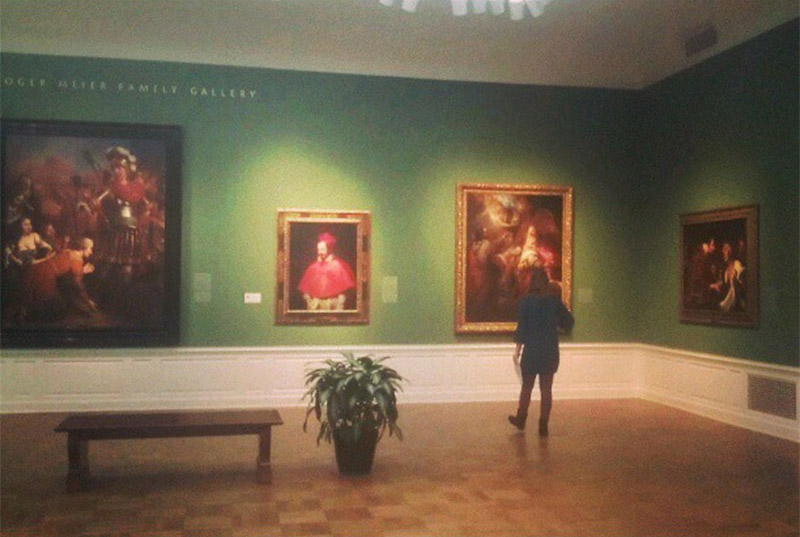
It's been a really fun week, filled with making photo props, shooting, going to senior portfolio reviews, going to film festivals, looking at cool animals, and getting lost in an art museum. Next week will be really hectic, as it is the last week of regular classes, so I warn you right now that I'll probably be missing for a couple days. Never fear though, after this week and the next, it's summer!
You can follow all my instagram pictures @impulsings !
I'm sure many of you have seen this by now, but I still wanted to share it. Matt sent it to me a little bit after it was posted, and I really loved the message behind it. Despite all the controversy that it's gotten (some people saying that it doesn't cater to different body types, some saying that it puts too much emphasis on physical beauty, blah blah), we have to keep in mind the message behind it. No matter what, physical beauty will always be judged. And while I think people put too much time and worry into making themselves look a certain way to please other people, we can't just push aside our physical qualities. I mean, our bodies are meant to be celebrated and we should celebrate our natural beauty. What I really love about this video is that it shows how much too critical we are of ourselves, and how the rest of the world actually sees us. You are so much more beautiful than you know. And it's the inner beauty that really shines on the outside.
So don't forget that you are beautiful, despite what you may think. Because there are people who see you and they see an amazing person with joy and happiness radiating from within, and that's what really makes you beautiful.
+ how to do photo expansions, add a vignette, and add backlighting
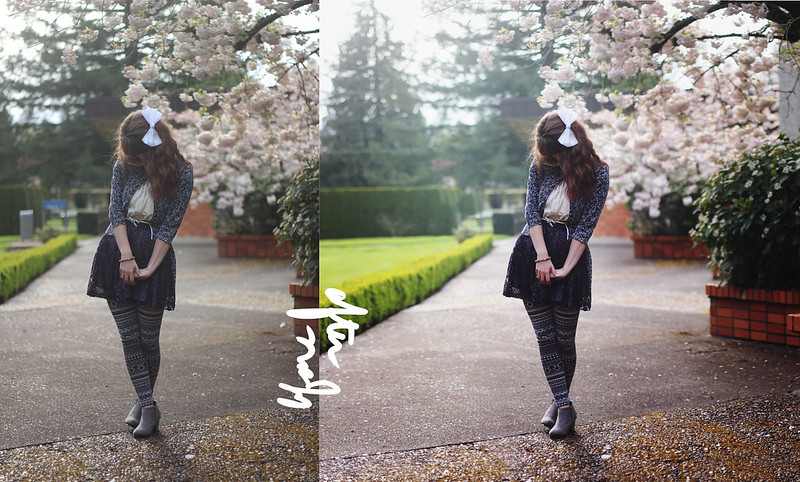
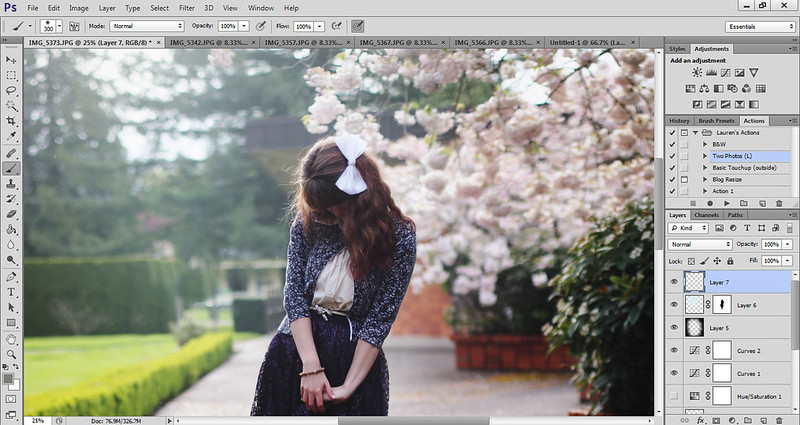
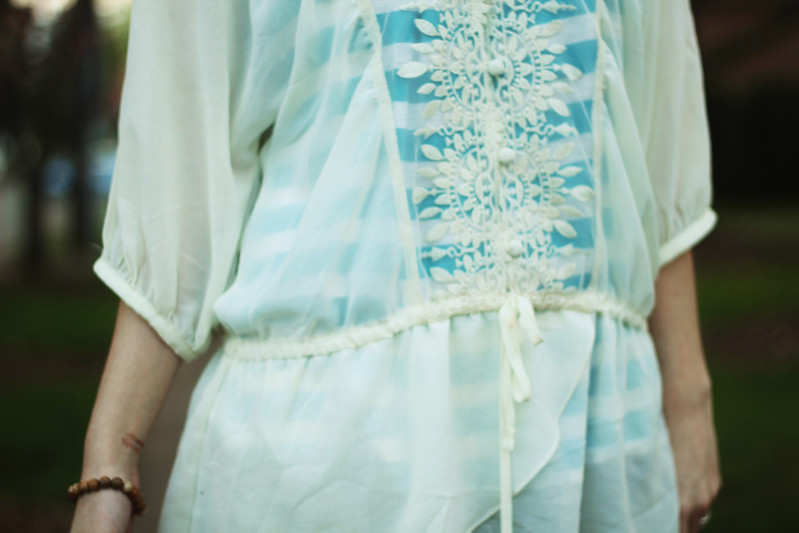
Today I'm going to show you how I edit my main outfit photo from start to finish. First of all, I shoot with a Canon t3i and 50mm 1.8 lens, use a tripod and remote, and edit with photoshop cs6 and a wacom tablet. Second of all, you can do this tutorial with any kind of camera and any kind of editing software. There's tons of free editing programs, and I believe photoshop cs2 is now available for free, so there are endless possibilities. As for cameras, you can even do this with a point and shoot. Perhaps it won't be as blurred as other, more expensive cameras, but you can even do blurs in photoshop. I did my entire first 365 with a $75 point and shoot, so you have no excuse! ;) Never let equipment get in the way of your creativity.
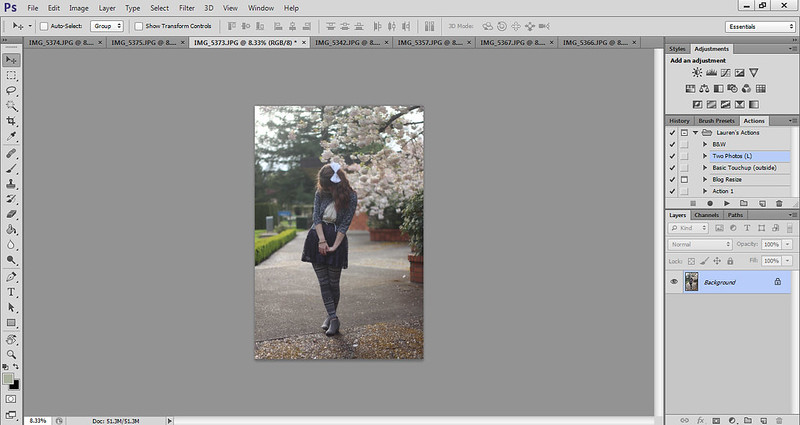
Let's begin! Here is the photo, completely unedited, in all it's glory. It's a good picture and there's nothing wrong with it, but because the camera is a machine, sometimes it doesn't capture how we remember things. So photoshop is great to fix those machinery imperfections. That's how I see using photoshop to touch up realistic pictures.
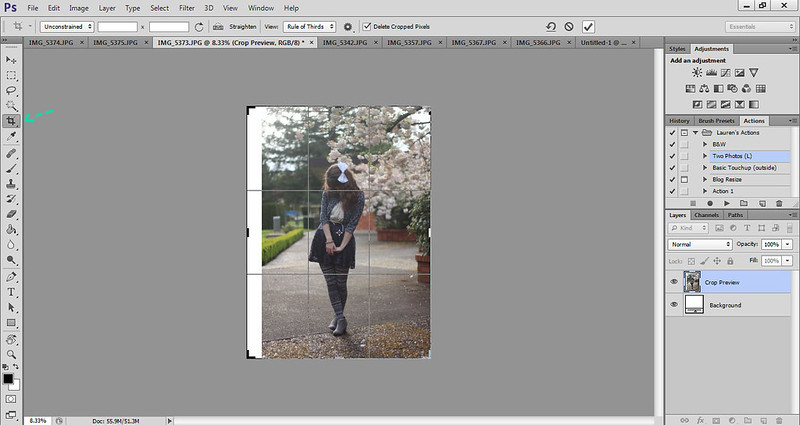
Step one: first I use the crop tool (press "c" in photoshop) and expand the photo so that I am perfectly centered. Then I press the check button on the top bar to confirm the action.
Step two: then I go to image>canvas size and adjust my width to be perfectly square.
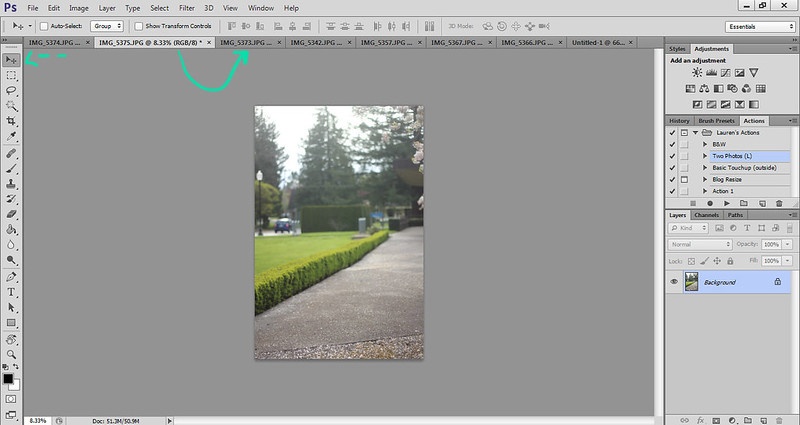
Step three: I had already taken two more photos of either side of my surroundings, and have them opened in photoshop. I use the move tool (press "v") and click on one photo and drag it over to the tab which then reveals my main photo. The second photo is now on a new layer (which you can see on the lower right side). I lower the opacity, which is on the right, right above the snapshot of the layers. Lowering the opacity allows me to line up the photo perfectly. This is also how you do the Brenier effect, which gives your photos a wide angle, shallow depth of field effect (which is actually impossible to achieve with a camera lens taking a single photo). You can do this effect on any photo, taking as many pictures to create your giant image. It's how I create most of my photos.
Step four: Then I add a layer mask by clicking the third inner button on the bottom right side. A layer mask is basically a forgiving way to erase parts of your photo. On a white layer mask (which is the default), a black paintbrush will erase, and a white paintbrush will unerase, so to speak. Don't worry if you don't quite understand it at first--it took me forever to figure out. I use the black paintbrush on the layer mask to erase the edges of my second photo, which allows for seamless transition.
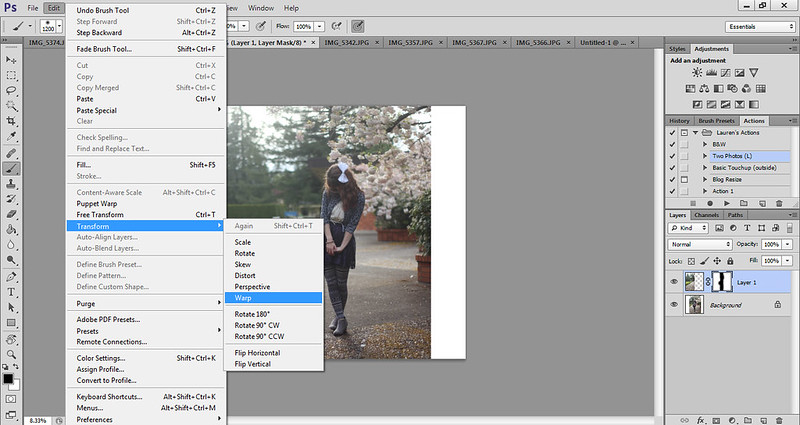
Step five: Sometimes the photos don't line up perfectly and you get repeating patterns in the ground or treeline, so the warp tool (which is only available for cs6, sorry) really comes in handy. I literally just warp the layer to stretch so that the repeating patterns disappear.
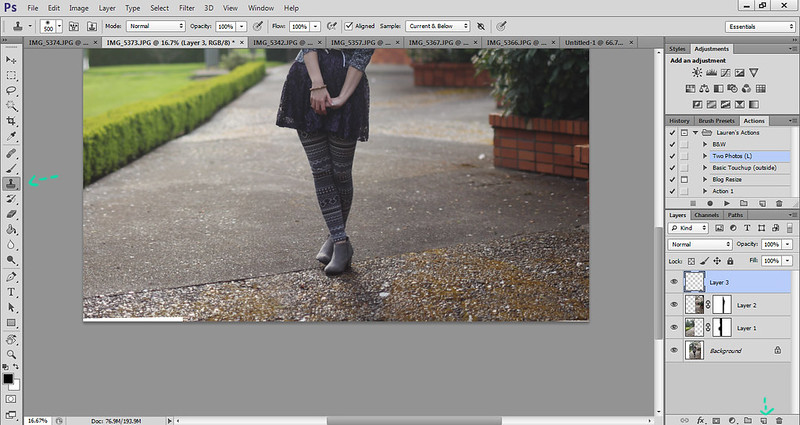
Step six: for any white space, I use the clone tool ("s"). First I create a new layer (on the lower right side), then I use the clone tool. You hold down "alt" (or "option" if you have a mac) to sample the part of the photo that you want to clone, making sure that you can sample the current layer and below, which you can toggle on the top bar. Then you paint over the white space with the same texture around it.
(I also use the clone tool to clean up the background a bit, removing any distracting elements.)
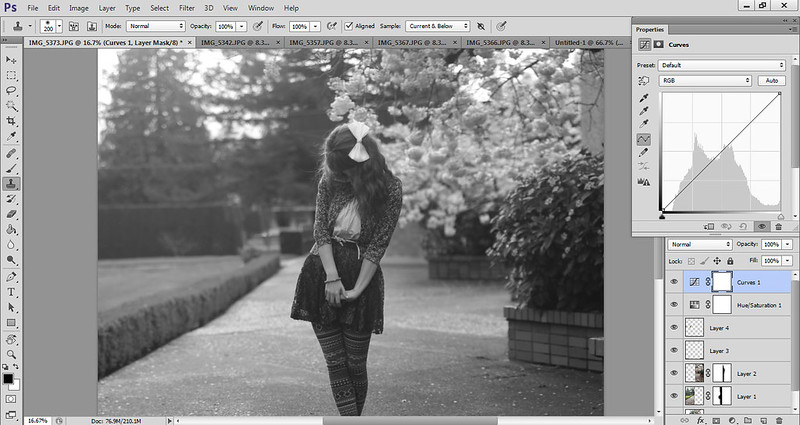
Step seven: Then I use the desaturation tool (which is under the adjustments bar, the first one on the second row) to momentarily desaturate my photo. Then I use the curves tool (the one I actually circled in the picture) to change the contrast of shadows and highlights. Turning the photo black and white takes away the distraction of having color so that I can focus solely on the tones. You can use the hand tool to click and drag on any part of the photo that you want to make darker or lighter. Basically, with the curve line, the lower you drag it, the darker that particular tone gets. The left side deals with darker tones, and the right side deals with lighter tones. An "S" curve usually gives you nice contrast.
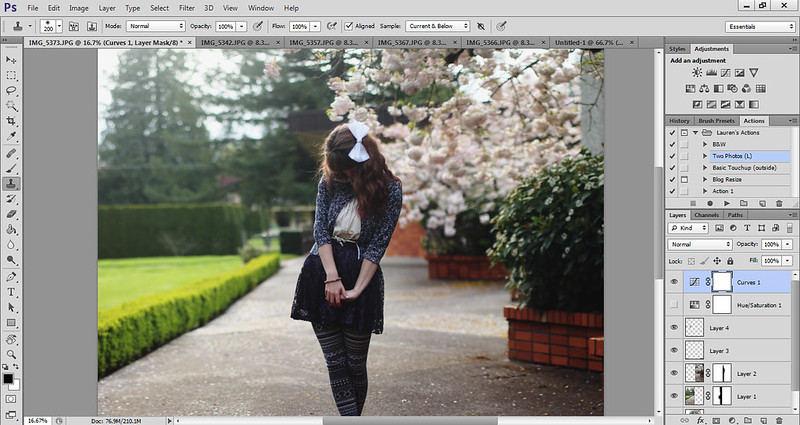
Step eight: I click the eye button next to my saturation layer to make it invisible, and you can already see a big difference in the photo.
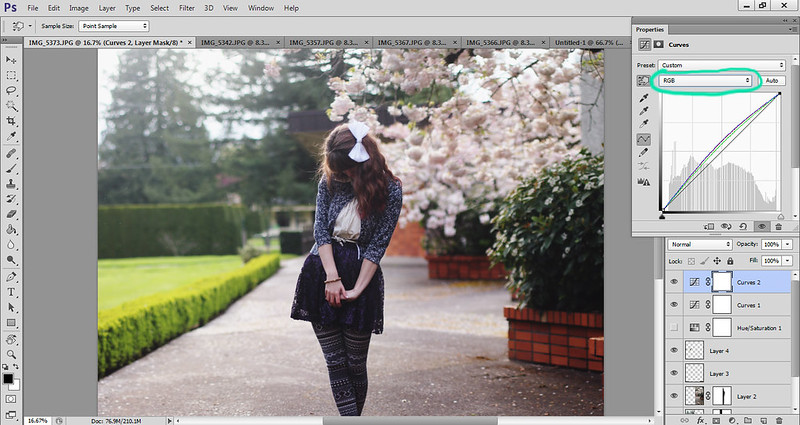
Step nine: Then I create another curves layer. This one is to adjust individual colors. The curves line then for red, for example, deals with red and its opposite, cyan. Left still deals with shadows, and right with highlights. Raising a point on the line adds more red to that particular shadow or highlight, and lowering it adds more cyan. The opposite of green is magenta, and the opposite of blue is yellow.
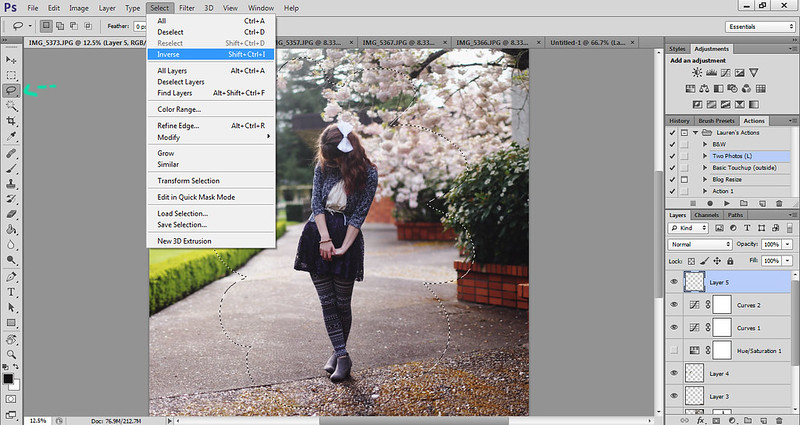
Step ten: We are nearly done now. Next I add a vignette to the photo. I create a new layer, use the lasso tool ("L"), and draw a cloud figure around me. Now I have a nice selection layer. I go to select>inverse to then select everything but me.
Step eleven: Making sure my brush is set to black (or a dark brown color), I go to edit>fill, and fill my selection with the foreground color. Then I deselect by simply clicking on the photo. This will remove those blinking lines.
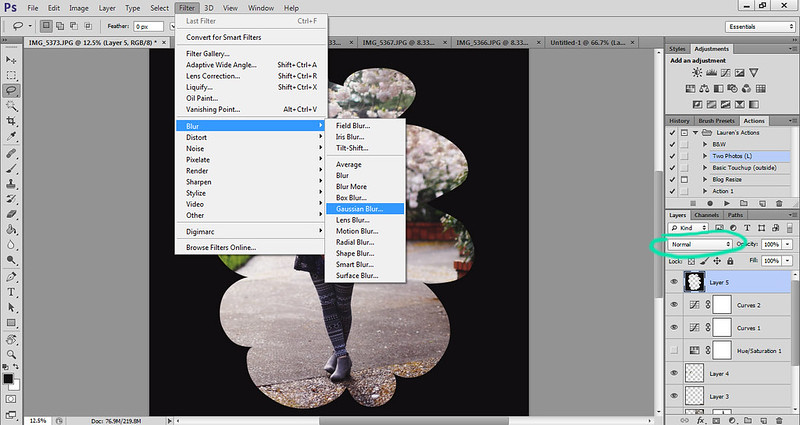
Step twelve: Then I go to filter>blur>gaussian blur, and generally do it to 333 pixels. This will blur the black border significantly.
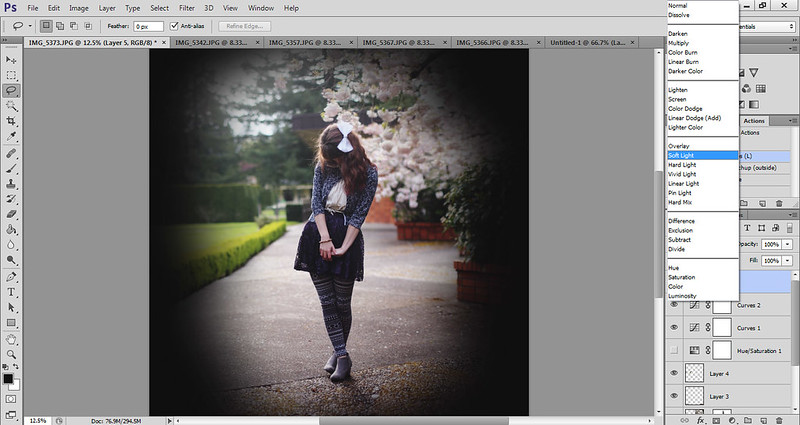
Step thirteen: After that I change the mode on the layer to soft light and lower to the opacity to about 30%, depending on the photo. And now you have a nice vignette!
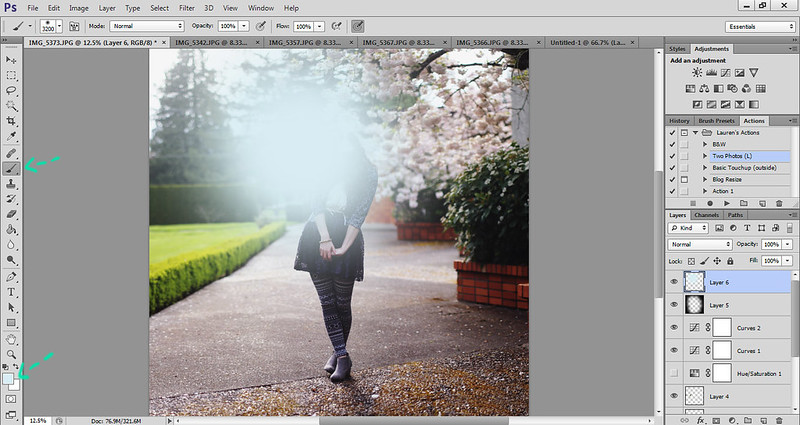
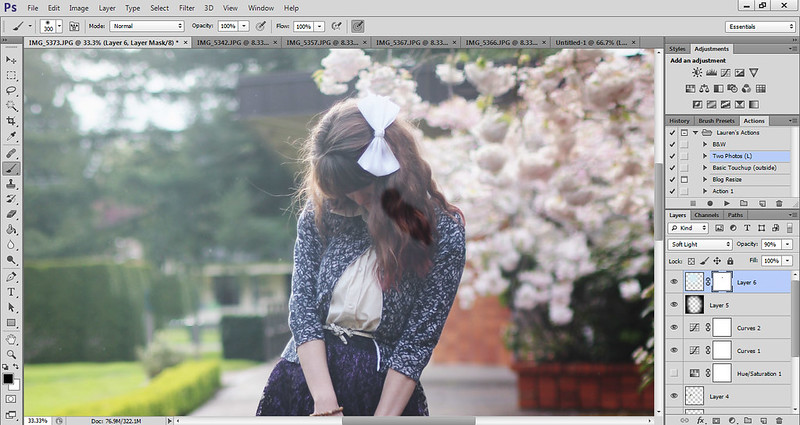
Step fourteen: This part is bonus, as I've just started doing this to my photos. To add some nice backlighting, choose a nice light color by clicking on the color box in the bottom left corner. Create a new layer, and paint a giant circle (adjust size by either using the size bar at the top left corner, or by pressing "]") on the layer. Change the mode to soft light.
Step fifteen: Then add another layer mask and paint black (ie erase) the color around your face and body. Then lower the opacity to your desired look.
Step sixteen: I then create a new layer and use the brush tool (you can change the color by holding down "alt" or "option" and clicking on whatever color within the picture you want) to remove any excess hairs that are sticking out.
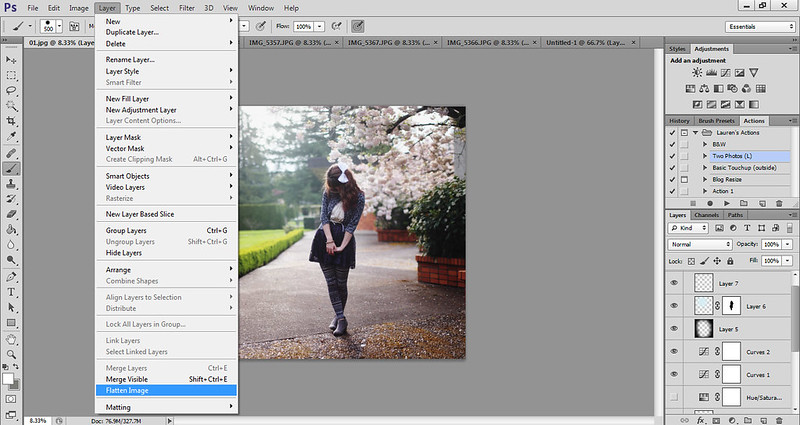
Step seventeen: Then I go to layer>flatten image (yes, discard hidden layers), which puts all the layers together. This allows you to save the file as a jpeg. Save your photo ("ctrl" + "s") and you're good to go!
I hope this tutorial comes in handy for you. This is how I edit all of my outfit photos, and the outline for how I edit my more "creative" photos. If you have any questions or need clarification on anything, please don't hesitate to ask! And if there are any other tutorials you would like to see, let me know!
Greetings to you from a very confused Oregon weather system! I swear, one moment the sun is out and it's sweltering and I'm breaking out my legs that haven't seen the light of day for months, and the next moment everyone's putting on coats and leggings again. It's even more awkward when you walk into class wearing shorts, and you walk out wishing you had packed on the layers. I suppose there's ridiculous weather everywhere though. When I used to live in Oklahoma, we would have tornadoes one day and blizzards the next. And of course after the tornadoes passed over us, we would climb out of the storm cellar and go out to eat. Typical Oklahomans. Tornadoes are definitely one thing I do not miss about Oklahoma. Earthquakes, I can handle. There's no time for my imagination to take over in an earthquake. But with tornadoes, when the sirens go off, you have maybe five minutes before the tornado hits and it's the scariest thing ever, especially when you're preparing yourself for the worst. I used to have awful tornado dreams too. Thankfully there's no tornadoes in Oregon or Alaska, so I'm home free.
On a completely different subject, I have a really fun post for you tomorrow! It deals with photography ... Can anyone guess it? That's right, a tutorial! Tomorrow I'll show you guys how I edit my outfit pictures, specifically today's outfit photos, plus a few extra tips and tricks, so stay tuned for that!
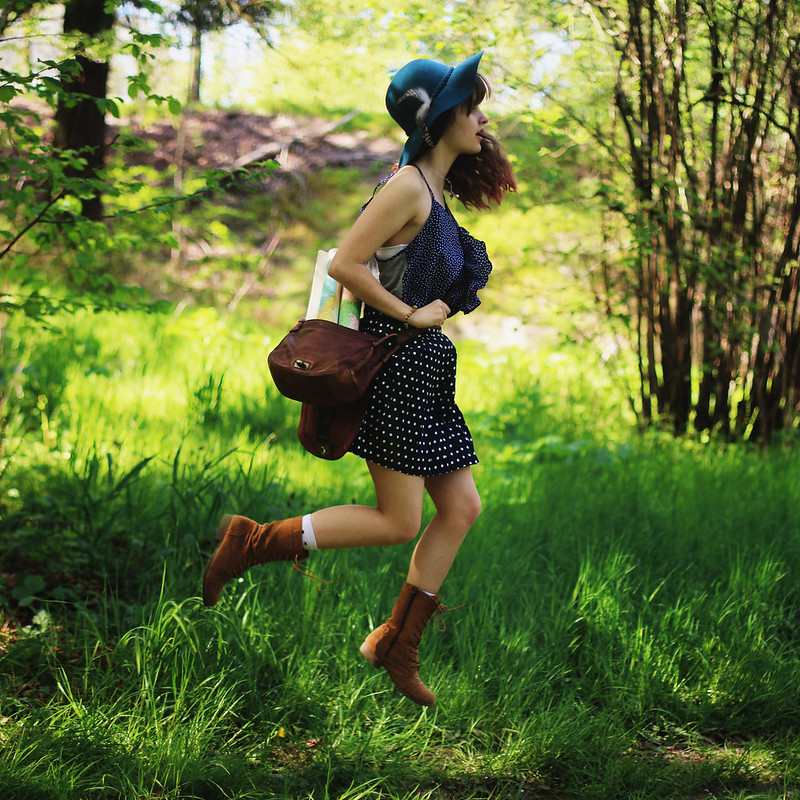
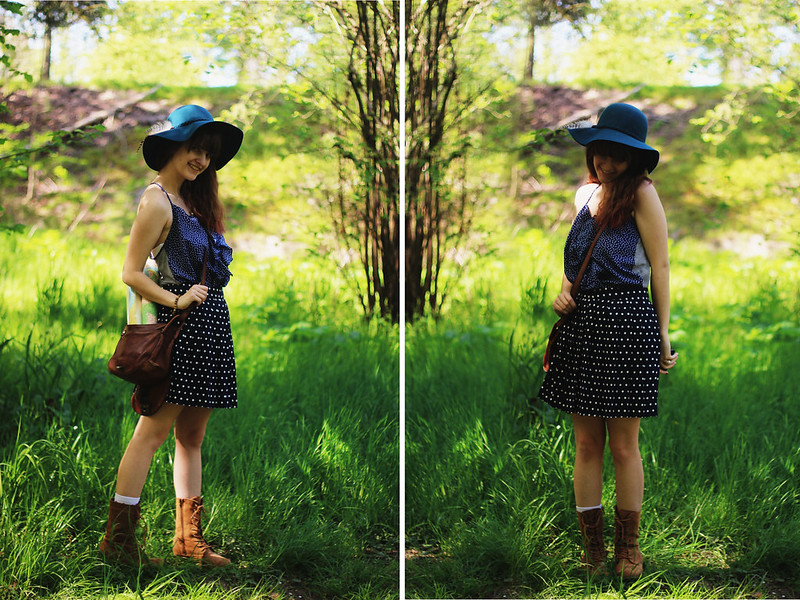
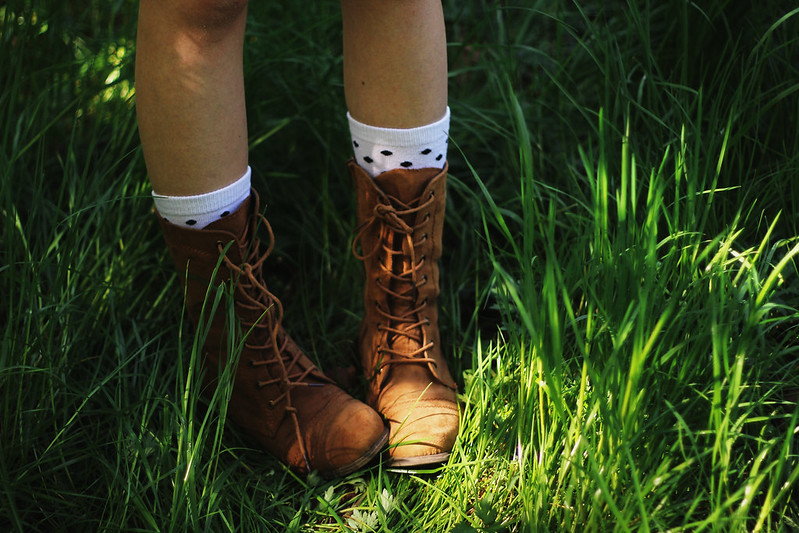
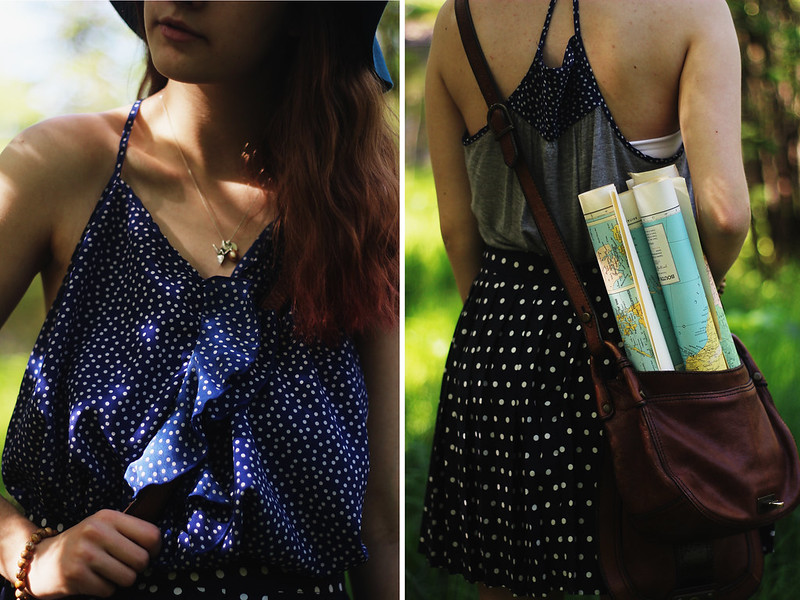
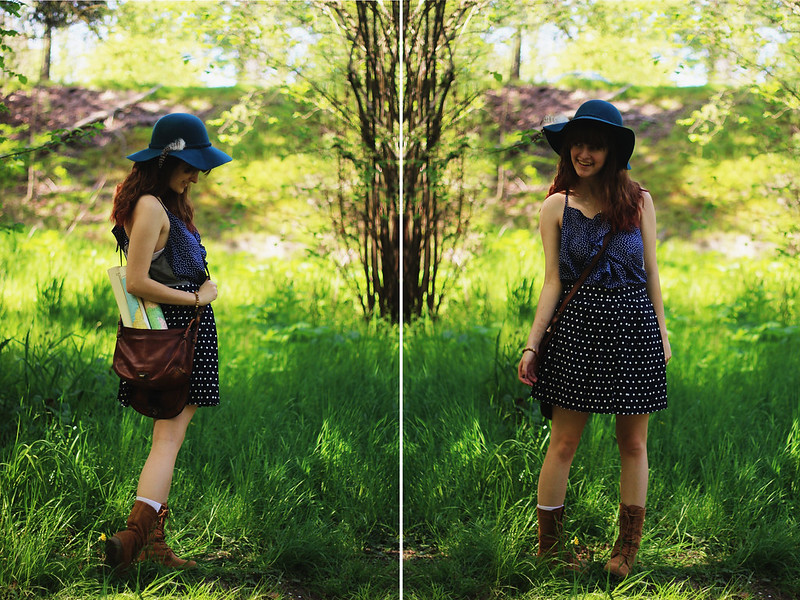
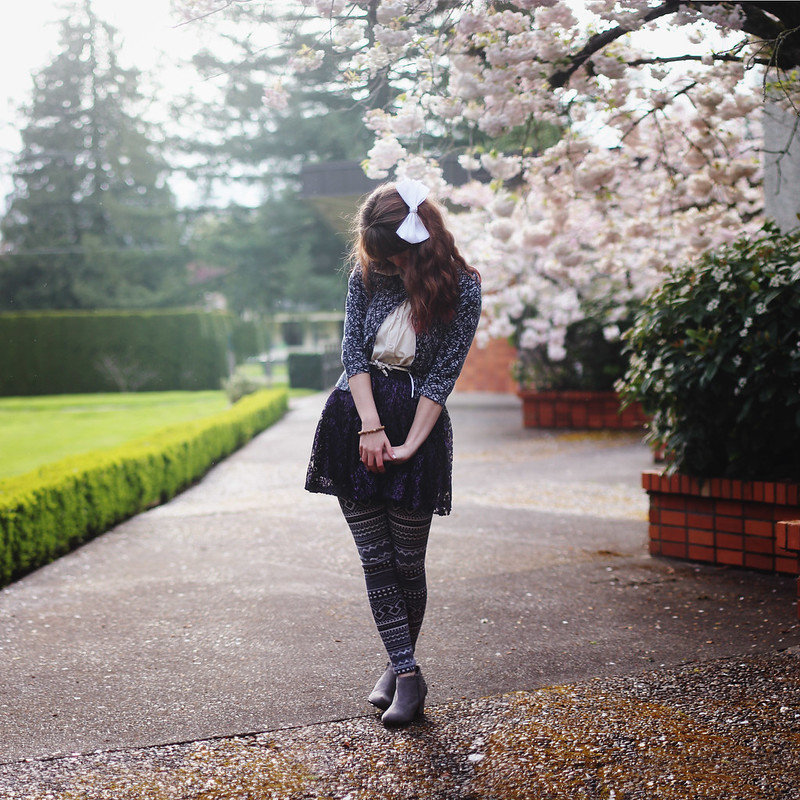
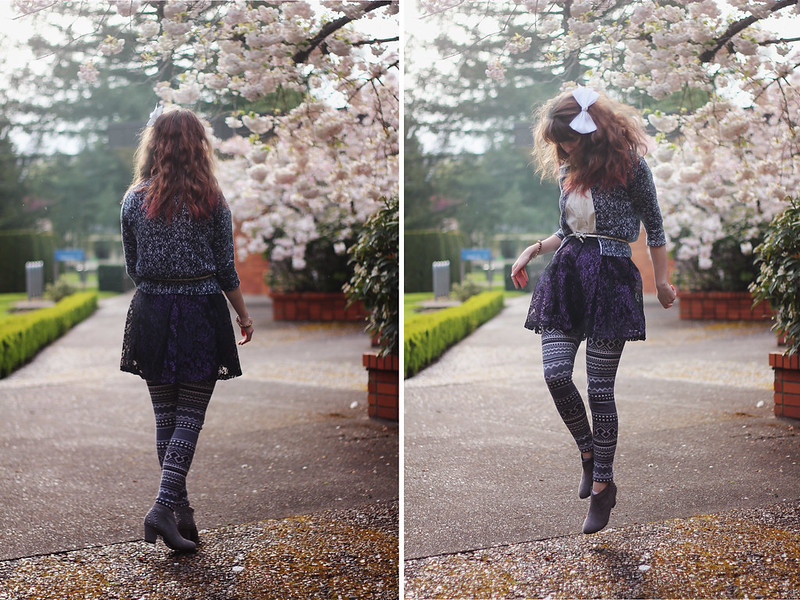
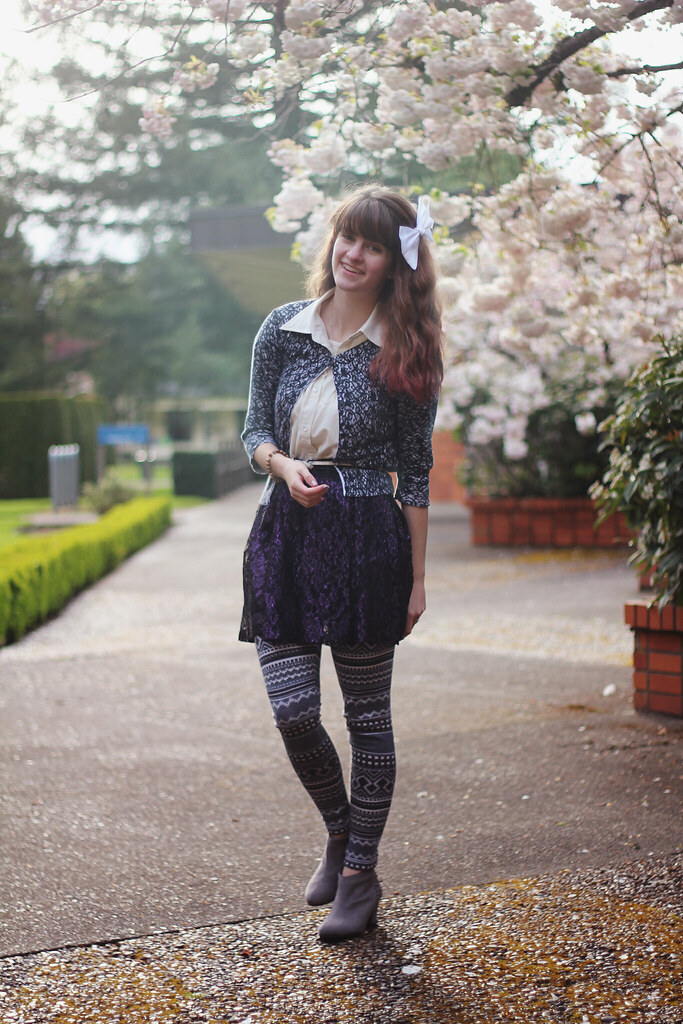
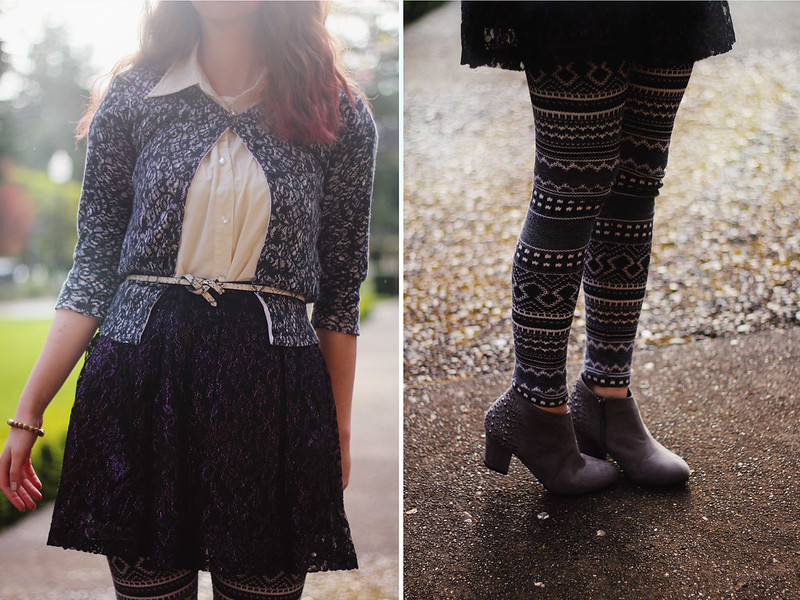
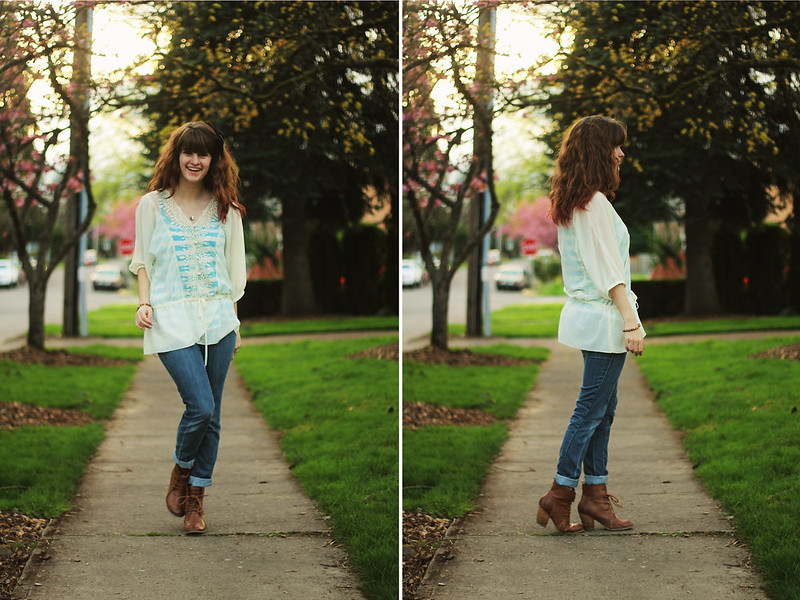
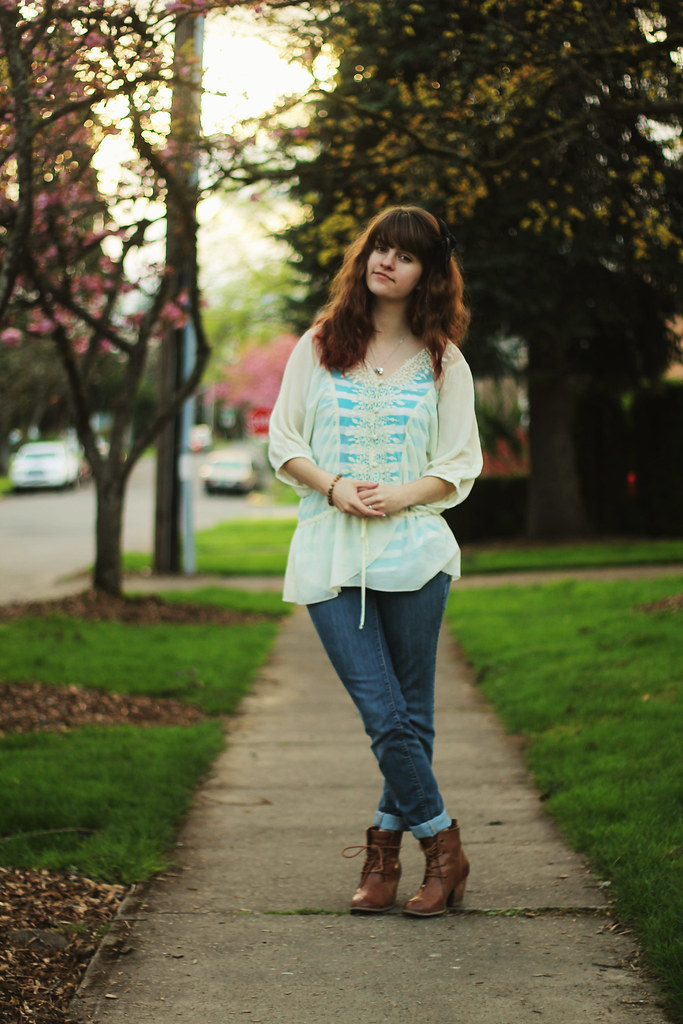
I wasn't planning on taking photos of this outfit, as I don't really find my lazy day outfits interesting enough to put on here, but I felt really pretty wearing it and my nails matched what I was wearing (love it when that happens) and the sun was shining, so I thought, "Heck, why not?" So I took a walk and shot beside a busy street, pretending to look at my camera whenever people walked past. I'm slowly but surely getting more comfortable shooting myself in front of people. It's weird how my mind works though, if I was in a crazy outfit doing crazy things for a "creative" photo, I wouldn't be so nervous shooting in a busy location. But posing normally? Perhaps it's the shock factor of those crazy photos that I hold on to (anything for the sake of art, am I right?), but then for outfit photos, I'm just taking pictures of my outfit .. how conceited! Which is also an absurd thought because I don't think I'm conceited, nor do I think any of the people behind the blogs I follow are conceited. In fact, if I saw someone taking pictures of themselves, I would think they were the coolest person ever! I don't know where I'm going with this, but let's just say that I think all you people with blogs are the coolest ever. Rock on!
Tuesday I sold my second piece of art ever! My photography teacher bought my piece from the Student Art Show, and yesterday I traded the framed piece for an envelope full of cash. It almost paid for my expenses for taking his class, haha. But in all seriousness, it's a fantastic feeling to have people so interested in your art that they want to have it hanging in their home. (Especially someone as cool as my photography teacher.)
Well, I best be off. My English teacher decided to have us read 90 pages for class tomorrow, and I'm nearly finished.
Update: I read it! So much reading ... my brain ...!